Showing posts with label Garage. Show all posts

November 24, 2010

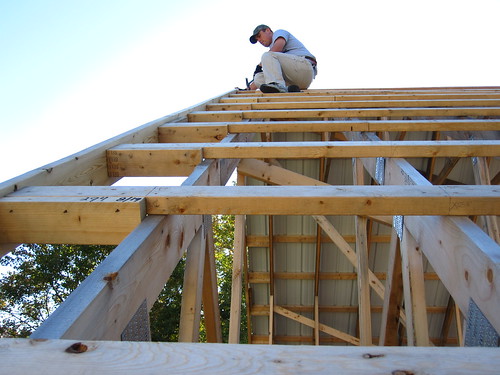
Houston, we have a roof!

WE FINISHED THE ROOF THIS WEEKEND!!!!


I'm a wee bit excited about it, in case you couldn't tell...


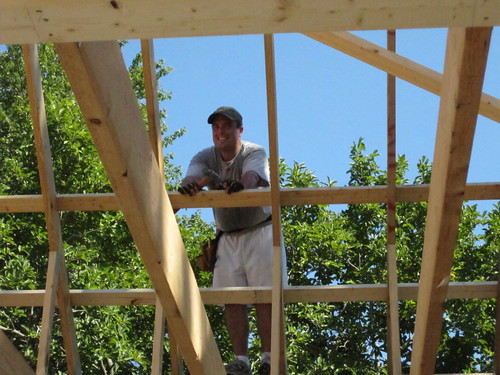
We started the days work with Pete getting up on the roof and working on the lookouts, while I cut the wood to size on the ground and passed it up to him.


Originally we thought that the back wall needed to get up in order for us to get the final two roof panels up. With talking to some old timers of the construction trade they gave us to schematics to make what is called a "chicken ladder" which should solve our problem of getting the panels up without a wall. Why is it called a Chicken Ladder? Cause you're too chicken to get on the roof and do the job without one.


I made the ladder out of 2-2x4x16, a few 2x4's and a bunch of little 1x's for the rungs. It took about two hours to get the wood cut to size and screwed into position before it was ready for work.


The idea behind the chicken ladder is that it hooks onto the roof. To get the ladder on the roof required Pete climbing up the purlins with me pushing the ladder from below until it got to the peak, then we could hook it on and place it over an already down roof portion. Once the ladder was in position we could grab the last panel and start our normal process of getting them up on the roof. Instead of walking on the roof purlins like before though, Pete used the chicken ladder to safely screw down the panel.

As expected the last two panels did give us the most trouble. We came the closest to losing one over the back side as Pete pulled it up, those panels are slippery little suckers! I've also never thanked my freakishly long arms more while on the job than I did while putting up the last panel. Because of the slope of the land at the very back of the garage there is about an extra foot or so of height that we have to deal with. To counter that we had to put the ladder on cinder blocks, which made it suspect to instability and was still a little bit lower than I felt comfortable with, as I had to hold the panel up with essentially just my finger tips. When Pete got the first screw in on that panel I was seriously super happy!


How are we getting the ladder off that roof you ask? See the rope? This weekend we're going to pull it over the side and hold our breaths while hoping that it doesn't break. Fingers crossed.

November 22, 2010

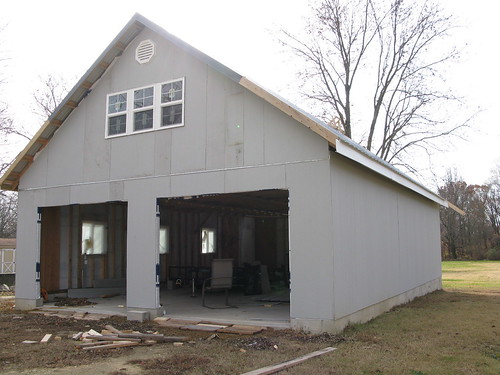
Front garage wall is up!

Three sides are up, one to go!


As for the garage doors, we'll be nailing plywood over the openings over the winter. During that time I plan on painting and prepping the doors to get them ready for a spring installation. We have to tweak them a little bit to make them perfect, a usually side effect of buying them used and saving boatloads of money.

November 11, 2010

Outta Room

We are almost all wrapped up with the roof! Only two more panels to go on the very end of the backside. Unfortunately those have to wait to go up until the wall is built, since we need to be able to lean an extension ladder on the wall in order to get the panels up. Follow that? Because I barely can.


The entire time Pete's been putting up panels he's been using the roof purlins as a ladder and screwing down the panel by leaning over from the side of them. He can't step on the metal roof cause it will act as a slide and dump him off the roof in a comical but super dangerous fashion. With the last panels, there is no more roof to stand on. So he's got to use a giant ladder, which needs to lean up against the back wall of the garage.


Pete, putting in the last panel where he can sit on the roof. You can see how he's almost out of room. And the view from inside.

November 5, 2010

Trucking along

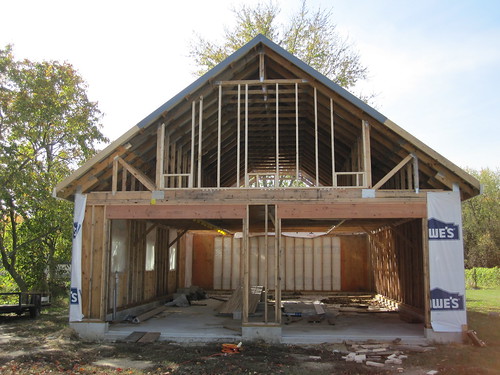
Late in October Pete framed out the upper front wall of the garage. Unfortunately he is going to have to re-do some of it because we've since decided to change the layout of the front three windows. Instead of having the windows so spaced out they are going to get pulled a lot closer together and centered in the middle of the wall. It sucks having to re-do work because of design change, especially at this point of time, but both of us agree that we aren't really loving the spread out look of the three windows.


What is on board this weekend for the barn:

-Getting our 14 boards of sub-flooring down in the upper space! Even though my arms are not looking forward to this work, I'm really excited about getting the floor down so I can finally get up there. The closest I've gotten is sitting on top of the ladder once.

-Frame out, house wrap, install the windows and side up the front upper wall. That is going to be a total bitch to work with the fiber cement siding up that high. We still haven't figured out how exactly its going to work, but I guess it can be done somehow.

I'll consider it a productive weekend if both of the above to-do's get done. With the highs in the low 50's and the diminishing sunlight hours we definitely can not put in the same hours that we did in the summer. And I fricken hate being cold.


I feel like the fourth door is turning into an "all barn garage all the time" blog, and I apologize for that to some extent. There has to be a few people out there who wonder if ANYTHING else is going on our lives. And yes, there are lots of other things. But at the same time, this garage currently our reality. Building something like this on the weekends as just a crew of two takes a really long time and tends to be all consuming.

We are always thinking about, talking about and working on the garage in almost all our free time while trying to balance a tiny bit of a social life and important family time. Once we get the garage wrapped up for the winter, some time in the next four weeks or so, we'll begin to be able to even think about doing other things. There are plenty of big plans for the winter months, so there will be no shortage of diverse projects coming up!

November 1, 2010

(K)need Protection?

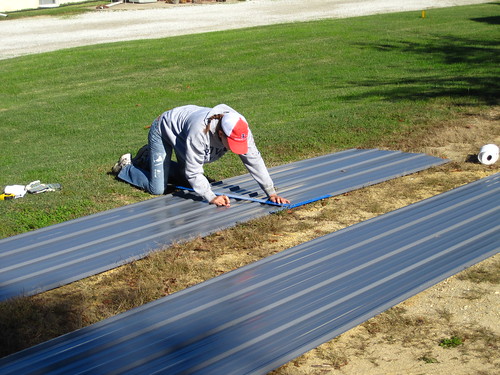
Like the total Mensa candidate that I am, I kept forgetting my knee pads when we'd go over to the Wee house. Kneeling in our sandy gravel driveway for marking the screw lines on the roof panels had my knees barking after just barely touching the ground. Enter invention, mothered by necessity. Carpet padding and blue painters tape was a win for protecting my knees enough for me to get the job done!

In other news, it is getting a little bit frosty up in South Jersey. In fact, this weekend it was 51 when we arrived at the site on Saturday, which is exactly half the temperature/heat index of the day it was when we bought all the lumber for the garage! We're not quite as along as we'd hoped to be by this point, which is dissapointing. Mainly because it means for some cold weekends coming up as we try to get this thing weather proofed before winter hits. I don't think we'll have a winter like last year, which hit us hard early and steady all throughout the season.

October 29, 2010

All up on our roof


Run down of putting up the metal roof so far....


1. Pull roof panels out of pile in garage and scatter about lawn

2. I measure and mark out the locations where Pete is going to be putting the screws

3. Grab panel and walk over to garage, Pete climbs ladder and puts top of panel on the roof.

4. I tell Pete to be careful as he starts to climb onto the roof purlins

5. Using my massive muscles I push the panel up as high as I can get it on the roof while Pete climbs up to get it.

6. Pete grabs panel and holds it while I'll let go to climb the ladder.

7. Once on ladder I push the panel up one handed until we get it up to the peak.

8. Line panel up.

9. From the top of the ladder I hold the panel lined up and keep it from sliding down off the roof.

10. Have extreme concerns about the panel slipping and beheading me as it slides down

11. Pete places first screw it at the top. I can let go and hop off the ladder now.

12. Pete continues going down the panel screwing it down into place

13. I mark out next panel on the lawn, as heights make my palms sweat in an extremely unattractive fashion. I barely am ok with the ladder.


You can see why there are no pictures of us putting the panels up, cause we need our hands! The panels aren't super heavy, but you can definitely start to notice some fatigue setting in by the fifth oneof the day. It is a lot of upper body strength used in bursts when putting them up. I love how they cover such a large area, so you see results as soon as you get a panel up. Very gratifying to have something that shows results almost instantly, even if it is overall slow work.


October 28, 2010

Garage Roof Situation

The last few weekends we've just been slogging through getting the garage roof done. It is definitely one of those slow but steady processes as we just can't seem to find a way to work any faster. As it is now, it takes us about 40 mins per metal panel of roof from the ground to finished installation. There are 30 panels total.

Why a metal roof? Mainly cause we thought it was cool. Isn't that always a reason to make a major decision that will be around for 40 years- for the Cool Factor. Metal roofs are pretty uncommon in the state of NJ, with the exception of broke down rusted sheds in back yards and random commercial properties. We've found that metal roofs are all rage outside of NJ. In fact, during our road trips we always end up pointing out all the cool metal roofs we see along the way.

Random factoid- Sookie Stackhouse ( of True Blood, my current obsession) has a metal roof. It is mentioned in books a few times and shown on the show.

One of the biggest benefits of choosing to do the metal roof was the fact that we didn't have to lay plywood/osb all over the roof the way you have to with asphalt shingles. You just have to put a series of 2x4's (purlins) up and the roof gets screwed into those. 2x4's -while not cheap when you have buy things in large quantities-are buckets of money cheaper than osb, which runs about $13 a board here for the cheapest stuff.

Then came the fact that I've helped dispose of two asphalt roofs in my time and they were hell to get rid of. I clearly remember shoveling the shingles off the trailer and into the dump and thought/wishing I would pass out because it was just that hard. The shingles are heavy, they break apart, are rotted, it smells like shit, and all sorts of gross bugs have made their home in the mess. Anything to avoid doing that again.

Along with looking cool, I love the fact that the metal roof can be recycled when its time is up. No trip to the dump for this roof! There are a lot of other major benefits to having mental roof and they are all available via a quick "metal roof benefits" search on Google. So far I'd recommend anyone in need of a new roof for a shed, garage or house to check it out. I'm iffy on recommending the DIY installation for a large structure, cause it is a wicked pain in the rear and we fubared a little part of it already.

I just realized that I've been lacking on the pictures during October. Perhaps I need to institute my "No post without a picture this month" policy again for November...

October 25, 2010

Garage Door Quest P.2


After a lovely drive on the back roads through the state of Maryland, of during which I only had one hunger induced meltdown about the way Pete printed out the Google Map, we arrived in the City of Frederick. Found our way to seller house and pretty much instantly upon arrival we were amped up.


The house was awesome, a large old historic home set on an idyllic lot in the middle of dream hamlet of stately old homes. The kind of neighborhood you walk around and just drool at when you're a historic home junky. Out of respect for the seller B* I'm going to gloss over a lot of the location details and story that led to him getting new garage doors. But I will talk about this house and B* cause he and his house were really just that cool.


Being super awesome and because Pete and I do not look like (nor are we) crazy weirdos, B* took us on a tour of his home and gave us the run down of the history behind it. We were enthralled as he showed us the original leaded windows, down into the basement and up to the third floor. It was really great to talk to another old home enthusiast and to see how he and his family have made living in such a historic home work for their modern needs without taking away from the original charm of the place.


After about an hour of talking and loading the garage doors on the trailer Pete and I really wanted to take a walk around the city. B* gives us directions on how to get to the downtown, offers us the use of his bikes and then tells us to pull the trailer into his driveway so we don't have to worry about someone messing with the doors. Nicest guy ever. And I don't even offer the people I meet for CL drop offs a glass of water.


We took a walk around the city, soaking in some more of the awesome historical homes and beautiful architecture. We grabbed a quick bite and ice cream for the nice walk back to the car. It was all in all, a great way to end our CL adventure.


Plus, we really do love the garage doors! Win all around!


October 21, 2010

Garage Door Quest P.1

Budget left for garage: pennies
How much garage doors cost: lots of pennies.

You can see our conundrum here. Garage doors are like woah expensive, which might explain why they are really something people don't replace often. Or ever get rid of gorgeous, drool worthy carriage garage doors for super cheap.

We shopped the big box stores, finding that the in stock options didn't really jive with the look of the barn garage. Briefly we thought about creating rolling barn doors for the front of the garage, close to what we have here on the current garage. Except that we don't really like the functionality of the sliding door for a garage. It can be a bit of pain when it comes to getting light in the garage or getting a car in and out because you can only open one side at a time.

Then for like a half a second we entertained the thought of getting gorgeous carriage doors made. But when a comma and a few zeros were attached on that price tag we slowly backed away from that idea.

Frustrated we turned to craigslist and searched all the areas around us to see what was available. When it comes to a big purchase like this we usually search everywhere within a 5-ish hour driving radius. No point in letting driving limit the potential to find something that could be perfect for us.

And in western Maryland- we found them. Potentially awesome garage doors for a great price! Pete started up a line of communication with the seller to find out more information and from there we started to get really excited about these doors...


Up next- the all day road trip and how freaking awesome the seller ended up being...

Anyone else willing to make the drive to find that *perfect* item for a great price? Or are we the only nuts who think nothing of hopping into the car and driving far far away to save some money?

October 6, 2010

Flashing

This might be the first time that I've ever flashed a window where a picture of me doing so has ended up on the Internet. Though its a picture of the boring version of flashing, nothing to do with booze, beads or Mardi Gras. Everything to do with installing a window. Yawn.


I've never really installed a window before. When Pete was replacing the windows in our current house I helped him in the form of holding the window still and bitching about the glass splinter I got. Being as this was new construction where everything was built square by us and to the exact measurements of the windows we purchased- I was up for the task. Trying to fit a replacement window into a existing space is much harder.


Installing the windows was one of the easier DIY things I've ever done. I'd put it a few notches below "taking a nap on the wood pile while Pete works". It took a little know how, which I got from Pete taking the lead and reading the instructions that came with the windows . And it involved caulk, nails and not dropping the window.

Like a lot of the construction I do around here, I don't feel comfortable giving you an extensive "How-To" guide or real in depth pictorial. But I can comfortably say- Give it a shot.

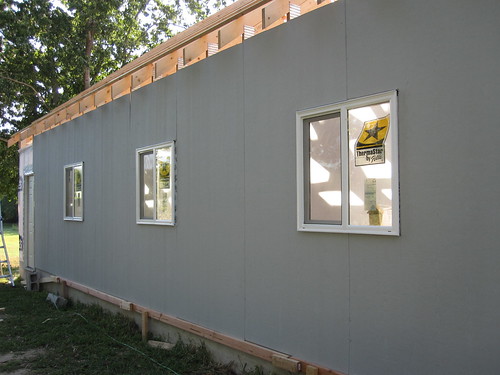
After the sills were flashed by moi, the entire wall got wrapped by the house wrap. Right on top of the window and door openings. Once the wrap is on completely you staple it down like crazy and then cut an "I" shaped slip to use as the opening for installing the windows.

The Pete magically transported back to the 1960's while nailing down the siding. Or I got bored and played around with the Picnik options while posting this...


Through the magic of the time warp internet- here is the finished sided wall! Three walls done, One and a half to do before winter!


*Looking for some helpful hints to window installation? DIY Network has some great info on their site here.


September 30, 2010

i heart air nailers

When you list your air nailer as one of your BFF's, you know you need to step away from the construction for a little while. I can't help it though, the tool is saving us from the massive arm and hand failure that we would have if every single nail had to be pounded in with a hammer. Not to mention keeping our siding looking a whole lot better. Could you imagine if Captain misses a lot (me) tried to hand hammer all the nails? There would be holes all over the damn garage.


At the start of this project I repeatedly professed my love for the air framing nailer. And I still love it. A whole lot, especially since Pete was able to fix it right back to working after its unfortunate *poooffff* incident. Well now our siding air nailer is getting the same love from me.

This is the one we've purchased. I know that buying an expensive tool for single one-off jobs isn't really in the cards for everyone. And that renting might be a better option for your own needs based on a wide variety of reasons. I just know that for us, and based on the projects that we currently have on our plate, renting a tool like this every time we needed one would be a colossal waste of money. It is much more cost efficient to buy the tool and have it available to us when we need it.

Pete takes really good care of his tools, so this one time investment should last us a long time and can hopefully be put to good use for many people. You never know who will need our help putting up siding! Or if we decided to re-side the entire house ( very likely).

Anyone else out there with power tool bffs also? Or is it just me?

September 22, 2010

Back wall siding up!


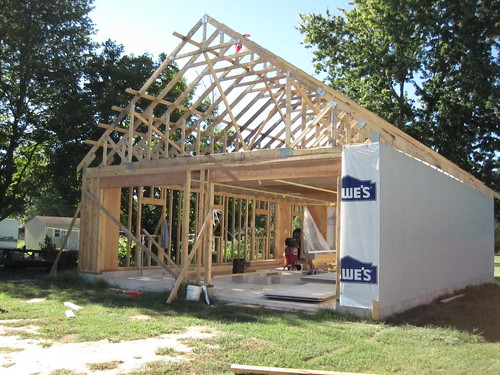
Closing off all the walls one by one...It is strange to not be able to see through the walls and into the backyard anymore! So funny how fast you get used to half done construction.

Since we knew what to expect from having already doing the long wall, there weren't many surprises during putting up the siding on the back wall. Only two small obstacles presented themselves during this wall.

The first was that the back wall of the garage is higher off the ground than the side wall due to the grade of the yard. That meant lifting the heavy panels even higher trying to get them on the support ledge. Thank you Aleeve for calming my screaming back.

The other issue we had to work through was cutting and extending the house wrap higher than the long side. Since the paneling will extend up the back of the garage we needed to make sure all the wood was covered by the house wrap with at least six inch of seams overlapping. Pete had a spare little roll of house wrap hanging out in the other garage that worked perfectly since we didn't feel like cutting up the big mondo roll.


Ta-da!


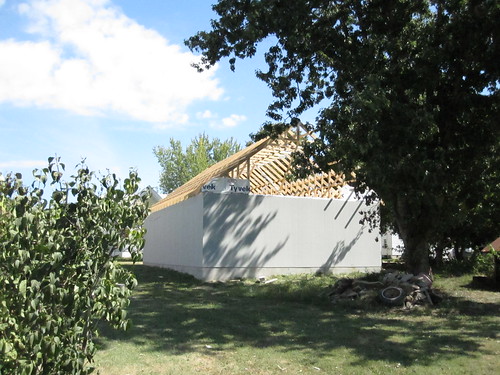
* Its funny, but I think with this wall up I've discovered a new favorite spot in the yard- right behind the garage! This spot is where we eat lunch while on the job and we chill out in the shade during water breaks. Oh, that pile of rubble next to the tree is left over from our concrete crew earlier in the summer when they tore up the old slab. We saved a decent amount of money if we cleaned up the site ourselves, instead of having the work crew doing it.


September 17, 2010

First outer wall up!

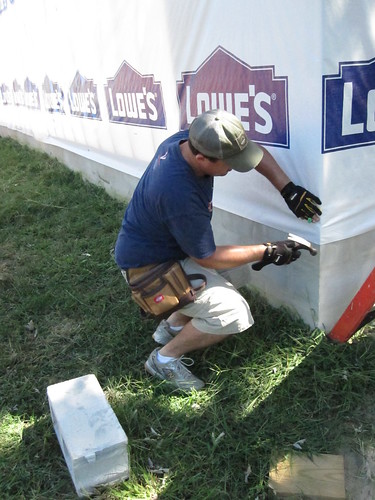
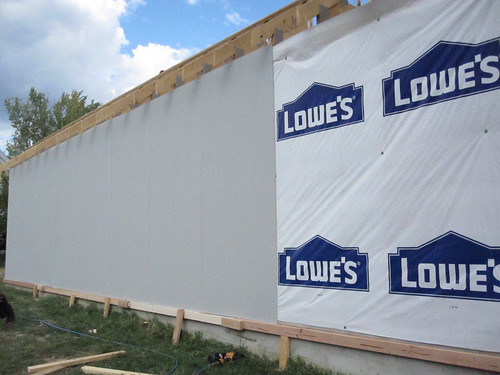
After the garage was mostly framed out, we started on the siding. The first step was to completely wrap the garage with a layer of house wrap. One big mo-fo roll of the house wrap was about $200. You saved $50 if you used the store brand instead of the brand name without a big ol’ logo on the wrap. So we sold out and decided to become corporate whores with the garage wrap ad to save the dollars. You win if you can figure out which big box store we bought the house wrap from, it is very subtle...


Wrapping the whole garage was pretty easy and fun. I unrolled the wrap and pulled it tight while Pete hammered in the nails. You have to pay attention to make sure the wrap stays level and covers all the exposed wood. Other than that, it was nice and easy because while the giant nine foot roll is a little awkward to handle, it isn’t heavy. We wrapped the long western side wall, and tucked the roll back into the garage for the time being. The heavy duty stapler helped get the wrap on the garage nice and tight.


Then, almost excited at the thought putting up our first piece of siding, we grabbed the nine foot section of cement fiber siding and tried to get it up on the wall.


Fail.

There was no way one of us could hold the board in place while the other shot nails in it. The boards are heavy, I’d put them at this-is-really-heavy-and-awkward-to-carry weight range and are extremely hard to handle (impossible) by yourself. We just couldn’t hold the board up flat against the wall and get it secured at the same time.


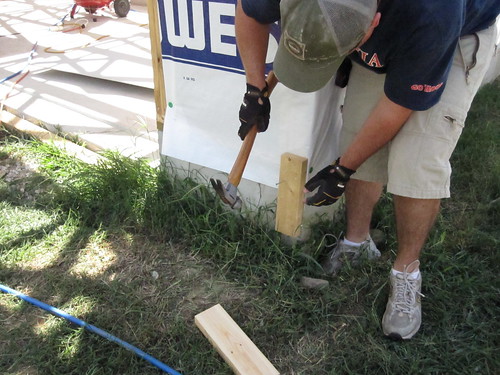
Quickly using those lumps that are three feet above our asses (bonus points if you know the movie ) we turned our plethora of scrap wood into a handy shelf to put the siding on top of. It was a little difficult to level the whole thing and then find a way to secure the shelf because, there was nada to nail it into on the side. The siding needed to cover all the wood which left us with only the cement blocks exposed. As a solution for that We whipped up corner braces and stakes to hammer into the ground for support. About an hour and a half after our original attempt, we try once again to get the siding up.


Success!

The ledge worked fantastically and we were able to get the first panel up and secured with little trouble. That is, if you don’t count the major muscle strain that it took to lift that unwieldy and heavy panel a foot or two into the air. You should see how much Aleve I am taking lately. I had to (temporarily) stop drinking beer because I’m afraid of causing liver damage. Or is that just with Tylenol and I can crack open a cold one after work again?


Second panel did not go up as smoothly as the first. We got the panel up and realize it is crooked. Damn it. Then, I absentmindedly softly kicked it into place- Bad idea! I cracked the bottom and it crumbled off. Whoops. To fix the lopsided bit we grabbed some shims and straightened out the panel using them. Since the west wall of the garage doesn’t have any windows, it is one super long stretch of putting up the full sheets of paneling. This needed to get up not looking like we did it while on a bender.


We worked and worked and worked...

Dealing with some challenges along the way required head scratching until we figured out a solution. Such as one really twisted framing board that fell right where the seam between two panels was supposed to be. A few quick cuts of an extra 2x4 and we had that board sistered right up. There was shimming going on left and right. Sweating, since this was on the sunny side of the building in the afternoon and lots of “I’m gonna drop it!” shouts but after a few hours of super hard work- we had our wall up!


:)

September 15, 2010

Garage Siding Decision

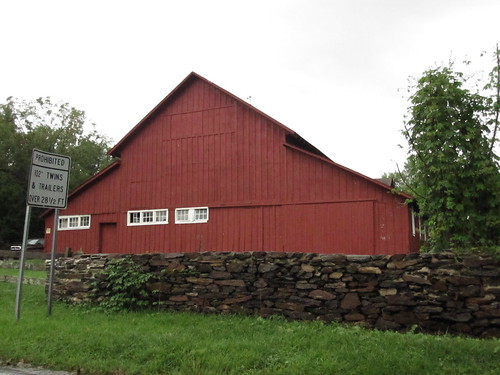
After Pete and I did significant garage and barn stalking about town we decided on a look for the garage. Traditional was going to be the name of the game here for our construction. Board and Batten!

I snapped this inspiration pic while at a stop sign out in PA. For once I was decently speedy with busting out the camera and nabbing a picture in time. Paparazzi I am not.


There was almost no debating different materials for us to use for the siding. We really didn't want vinyl siding thinking that it is much better suited for a different style than we were aiming for. Overall the base price of the vinyl was better than all the options, but we knew that vinyl siding requires plywood or OSB sheathing to be put up underneath. All that wood product, even OSB is about $13 a panel around here, was not going to be budget friendly for us considering the size of our exterior walls.

We'd heard good stuff about fiber cement products and we were pretty much sold on it from the get-go of the project. Doing some more research on the fiber cement products only swayed us right on into the definite column. Fiber cement products, offer some serious protection against rot and bugs, plus has much longer longevity for wear than most anything else. Major bonus and a huge check in the YES column was that fiber cement would not require any wood product sheathing. Saves trees and us money! My fave combo right behind cheese and wine.

Also worth a mention is that I like the pro-environmental aspect for the fiber cement siding, we're always up for doing things environmentally friendly around here. In fact I'm still pushing for geo thermal, solar power or a back yard wind turbine when it comes time to look into electricity or heat/cooling systems. But that is neither here nor there right now.
While fiber cement is certainly not the end all be all green siding primo contender-it is a better earth friendly choice over most traditional home siding options and I think its always worth considering for a new build. Here is a pretty comprehensive guide to the environmental breakdown of fiber cement siding.

Ultimately we decided to not go with Hardie Board, which is the brand name of a fiber cement siding producer. Nothing personal James Hardie, it is just that CertainTeed has the same product you do but for a bit cheaper. We went with the WeatherBoards Cedar No Groove Vertical Pane option. The vertical batten boards will be put on later.


September 14, 2010

garage planning

When we set out to plan this garage we did a couple of planning steps before pulling the trigger on the project.

The first was to pick a size that would suit our needs for now and in the future. Currently we have a two car garage and a healthy sized shed. Both are stuffed full of assorted stuff. We are not minimalists, by any sense of the definition. We also have about a billion and a half cars, plus a riding lawn mower that would all just love proper housing. What can I say? Pete’s a total car guy. Some guys have sports. Mine has engines.

This isn’t a new organization revelation by any means, but we found that for us- we’re able to cut down on the crap by knowing what we have. That means everything should be in one place, so we don’t end up with primer in the attic, basement, shed and that random closet where things just find themselves. In the past when we’ve gone through and really assessed our stock of shctuff we’re pretty much mind blown with how MUCH we have that didn’t get used. One or two or a few times of seeing how much was a wasted purchase or “yes please I will take your handmidown” was enough to get our rears into gear. It had to be a together effort for better organization that we’re always continually working on.

Knowing that we needed a place to store pretty much everything- the cars, the bevy of power tools that Pete treats like children, the construction supplies for all the houses and anything else that might come our way ( children, eventually) - we decided on a four car garage. We knew that would be all we would ever need and then some. Frankly, if we ever max it out then just call “Hoarders” and some therapists because it will be clear we have a big problem.

Second big planning step we took was- How do we want this to look? Since our house is old, and we live in an older town we took a stroll around and stalked out our neighbor’s properties. Besides being slightly creepy as we stood on sidewalks and stared at garages about town, we also noticed a trend. Most of the out building structures were older, quite big and barn like. Since we’re in the middle of a town, I doubt they were full blow farm barns. But smaller stables, livestock pens and carriage houses- definitely. We loved how often they seamlessly went with the main house. Because of that we wanted to build something that looked like it could have always been on the house.

Small side note here, the Wee house is one of the older houses on our current street. I’d place most of our neighbor’s houses at the 50-80 year old mark. Since our house is pushing about 120 years old that means we win! I’ll collect my prize of dealing with termite damage later. In talking to our neighbor he told us about the barn that was originally on his property but has long since been torn down. Pete and I gather that that barn was once ours. This is partially from nothing more than our own need to make up the gaps in history and the fact that it is strange a house of our size and age wouldn’t have a barn. But we think that when our house sold off the land to be divided for the neighborhood- the barn wasn’t on the property anymore.

Once we had the basic design down it came time to plotting out the land for the garage location. Since we have a very narrow but long lot the garage is two cars deep, instead of all across. With that layout it just fits better with the flow of the land. Knowing how we utilize our current yard, we were able to apply those same basic principles of use to the Wee house lawn without living there yet.

Here is the last part of the planning- discussing the budget. We knew this garage wouldn't be cheap, because new construction of this size never is cheap overall. But that we'd defiantly do our hardest to get this built while still being friendly to the bottom line of our total renovation budget. So far we're sticking to the budget like me to that last little bit chocolate cake on a plate.

Then the fun started and we applied for our demolition and construction permits….

September 3, 2010

Hammer Time! ...'cause the air nailer died

Pete was up on the roof balanced precariously on a 2x4 when our air framing nailer decided to go *POOFFTTT* and die on the job. My best tool friend on the job site was dead! Unfortunately everything we planned to do that day revolved around the framing air nailer. Pete went old school with the hammer and manpower for a few boards, in order to finish what he started but after that he had to switch gears and work something else.


I stayed on the ground, measuring and marking a million boards for our roof purlins. The delay of the air nailer breaking meant I was able to get a lot of them done and stocked up waiting for Pete. Check it out, the garage is really coming along!


Thankfully Pete is super handy and later on in the week (after a few hours of taking the nailer apart, inspecting it very carefully) he was able to find the thingy that seemed to be broken. Some small tweeks were needed and then the air nailer worked again! Phew.

August 30, 2010

Much ado about trusses

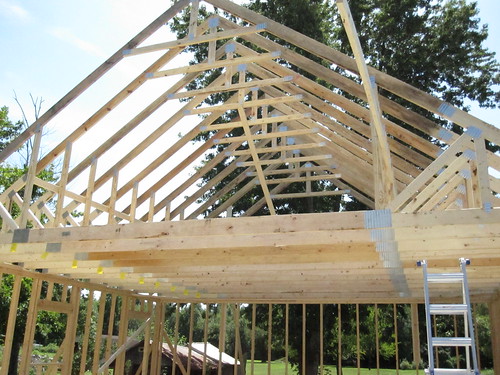
Look back over DIY trusses putting up’ing:

- Work with a crew who knows the basics of construction and DIY work. You don’t want to have someone over who has never picked up a hammer before. Enthusiasm -while wonderful is second to skill for this task.


- Be knowledgeable. There were a lot of little things that Pete got done before the trusses went up that I haven’t touched on. Please do not use my thoughts on the garage process as an all encompassing DIY guide to building a garage.


- Realize how dangerous the job can be. When you are alert to the fact you have to be thoughtful and careful the entire time it really helps everyone stay on their toes to keep safety as numero uno.


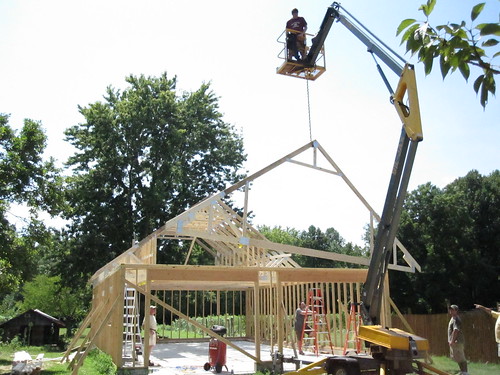
- Have the right equipment! What was done to our garage could have never gotten done without the bucket lift and our firefighter friend manning the controls for it. He was 30 plus feet in the air the entire time and not a peep of complaint. I think maybe we should have gone for a crane though.


After the trusses went up Pete and I talked about the whole day in lengthy detail and what we learned from the job. I told him that I’d be really hesitant to recommend the same route we took to many people who were looking into building a garage. In fact I’m still not convinced that we should have taken the DIY route for this job. It. Was. Hard. This job was one of those times where I’m glad that the final DIY product is good but it was a royal pain to get there.


When you combine everything that is making our garage unique, you get a lot of complications with DIY construction. Th big starting point is the size of 26’ x 40’, which makes it a four car garage (hi, my husband’s name is Pete and he is addicted to cars) instead of the much more regular two car sized garage. The size required almost double the amount of trusses than what would be considered standard. Had it been a normal amount, I think everything would have been able to be wrapped up by 3pm, which was when we were about 2/3rd the way through with the 22 trusses.

Then we have the open room space on the second floor, instead of the space being eaten up by roof supports. While I can’t wait to have all that spare space and think it was a great idea to add for not that much more added money, it also lead to needing a higher roof to create usable headroom space and balance out the first floor car space size. The high pitch also helps to mimic of our house’s roof, trying to tie everything together in some sort of continuity. All together this meant we had bigger and bulkier than normal to handle floor and roof trusses and at almost 200lbs each they just added another layer of difficulty to an already hard job.

Had everything not been New Jersey super sized I think it would have been a bit easier to handle and get done without having a panic attack on my end…

Want to see some more DIY Garage building?
Check out Life Begins at 30's awesome garage! I adore the french door that overlooks their backyard and am a little (lots) jealous at how fast the project seems to be moving along.
The Flipping Couple built a massive space to help house their cars from the frosty Minnesota winter weather.

August 23, 2010

Rain Delay

The day after the trusses went up dawned grey and misty, and Pete had to head out to work for a morning assignment. By the time Pete returned the mist had turned to steady rain with no sign on the radar of stopping. Undeterred ( or stupid) we geared up to finish a few things on the garage. Having slight hope of catching enough of a clear section of the day in order to get them done.
Silly silly us.
We arrive at the Wee house and it is pouring rain.
See all the piles of wood to the left of the garage sitting on the ground? We moved them "inside" the open garage in hopes of preventing major warping. Once that is done it is still pouring rain. Pete needed to get up to the roof in order to add the purlins, which would be our next step. There is no way it is safe to do that though with all the rain coming down. He was contemplating what to do next when I snapped this pic from under the cover of my pink hard hat.
Here you see me, with my naturally optimistic nature and love of rain keeping a smile on my face. Yeah it was pretty rainy out, but whatever. I try to make the best of every situation.
Half an hour of pushing our giant rented machine around in the sandy mud in order to get it hooked up and I'm twice the drowned rat I was before. The smile is gone, I'm freezing and day dreams of dry shirts are dancing in my head. Behold- the worst picture of myself I've ever put on the internet. The heated seats of our SUV were amazing on the way home.


August 20, 2010

Up go the trusses!


Last Saturday we put up the trusses on the garage...

Putting the trusses up was hard all around. It was physically exhausting from lifting, hauling, climbing and running around. Mentally it was tasking because putting up these trusses was a super dangerous job. Weighing in at about 200lbs, 26ft long and about 12ft high for each truss these bad boys were not to be messed with or underestimated. Wrong moves could have spelled disaster for the truss, our framing or worst of all, one of us who were working on the crew. My dad was on a job site once when a roof collapsed and unfortunately there was a fatality because it.


Right before 8 o'clock in the am we roll up to the job site with coffee in hand. During the next hour we go about prepping the site while our recruited helper, my dad plus our friends Eric and Steve, roll in. Then Pete's dad shows up with our rented scissor lift. Which my dad insisted on and we all agreed that it was $350 well friggen spent at the end of the day.


The guys get down to work with hoisting up and placing the first truss. I'm trying to watch to see where a job roll for myself can be created. Unfortunately, this is where it all started to go downhill for me. I can't really explain why, but I was about two steps short of having a complete panic attack by the time the second truss is going up. It must have been that I watching all these guys whom I really care about and love doing such a dangerous job. Whatever it was exactly, I had to stop watching immediately or I knew I was going to loose it.


Since there was really no job for me to be doing on the trusses I went inside the house and decided to do some organizing of supplies and demolition. Getting away from watching the work outside helped immensely and I was able to focus my energy onto something else besides worrying.
Once I calmed down and after my run to Wawa for lunch for everyone, I was able to snap a few pictures of the work happening. Then I ran back inside and did more work there until late afternoon. Some might say I punking out on putting up the trusses and I get that maybe I was a little bit. But the reality really was that there was not anything I could do to help until a certain point.

That certain point came mid-afternoon when about 2/3 of the trusses were up. After a grueling day of hard work (that we seriously appreciated) two of our crew had to leave. Which is when I jumped in to help finish up. There was an established rhythm going on at that point so I was able to find an area of the job that I could do. Soon enough I fit right in and was working along with everyone like part of a well oiled machine.


The sun was going down as the last truss went up 10 hours after placing the first one. At that point I can hardly explain to you readers the sense of relief that I felt. Everything was up and there were no major accidents that occurred. I hugged our friend as he went to go home for the night, thanking him profusely for all the hard work that he put forth for our benefit. Sometimes the kindness of your friends and family really touches you and this was one of those times. They must really like us to do all that work.


Even though the sun was gone, the night wasn't over. Trusses are super sensitive when just set up with no braces and the last thing we wanted was a stiff breeze blowing through and knocking all the hard work done. After a quick pizza and blueberry pie break we got right to work on bracing the trusses for the night. Even though we planned on coming back the next day to finish the bracing you just never know about the weather and what it plans to do, so we wanted the peace of mind.

Right around 10pm we rolled outta there for the night.


Long hard day it was indeed.