Showing posts with label Stairs. Show all posts

June 6, 2011

Opperation Staircase- Completed!


All throughout the month of May we had a deadline looming with the approaching Memorial Day holiday. That unofficial kick off of summer meant our beach condo rental season of the beach condo was gearing up to take off. Call me crazy, but I think our renters would be expecting stairs in a two floor condo. Which meant we had to find the time in the jam packed month to rock out the final steps to finishing up the stairs and hallway.


Desperate to not have a repeat of last years ridiculously stressful final project wrap up and pre-season cleaning, we made a realistic time line of what tasks were left. Being honest with ourselves and how much actual work was left made all the difference this year! Instead of stuffing everything into one workfest of a weekend we decided to stretch the time and break our project list into two weekends.


The To-Do list looked something like this:


- Install steps


- Poly and silica coat steps


-Install handrail


- Switch out Microwave cabinet


-Paint "new" media cabinet


- Hang wall art


- Uber deep clean


- Pack up all "our stuff" and put rental items out


- Get burned on beach


In case you don't remember, we decided to make our winter/spring project in the beach condo the staircase and hallway. The staircase was a beat up blue carpeted nightmare topped with a plastic tube as a handrail. Ever since we replaced the hallway/upstairs landing blue carpet with the same laminate wood flooring as downstairs it wasn't a huge project to freshen up the space, but one that was really needed!


Where did I leave off with the stairs...ah yes. I was pissing and moaning about staining the wood steps and how despite my best efforts I couldn't get the stain to absorb evenly. Sigh. Such is a nature of pine and light stains, you can apparently condition the wood all you want but it will still absorb the stain with varying degree. Either that or I just plain suck at one the easiest diy tasks one can do. The great news is that after applying three coats of brush on poly the steps looked 75% than they did when simply stained. Perfectly acceptable for something that is only going to get stepped on IMO.


A big thorn in our sides during this project was wtf to do for the handrail. We checked out every single availible option and debated at length about what to do. Finally, it got down to two weeks left before Memorial day and we needed to pull the trigger on something. As luck would have it, we drive right by the showroom and warehouse of one of the biggest suppliers of sprial staircases in the USA on our way to work. We stopped in on way home and talked to a super nice sales guy about our options. At first he showed us this gorgous custom oak banister that I was drooling over, but it was $900. So I kindly cut the sales chase and said "That's gorgeous, but we're looking for something much more economical and in the DIY range. What do you offer?"


Which is how we ended up with a $300 brushed stainless coil in the back of our car as we pulled away 20 minutes later. It was the cheapest option that looked the best and that we could DIY. A black factory powder coat was availible for an extra $150, which I would have loved to get but could not justify opening the wallet even further for. Even though the railing was way more than we wanted to spend it was justifiable in the fact that we could not find a-n-y-t-h-i-n-g else that work. And rather than continually spend money here and there for experimental items we bit the bullet and bought the item for full blown retail.


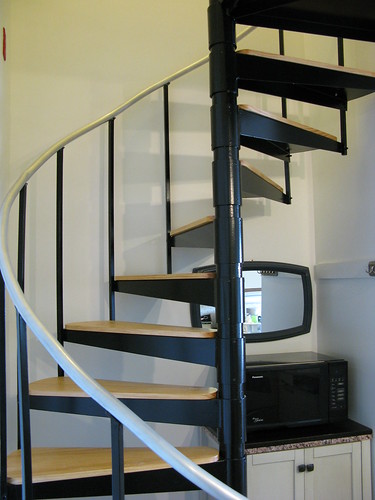
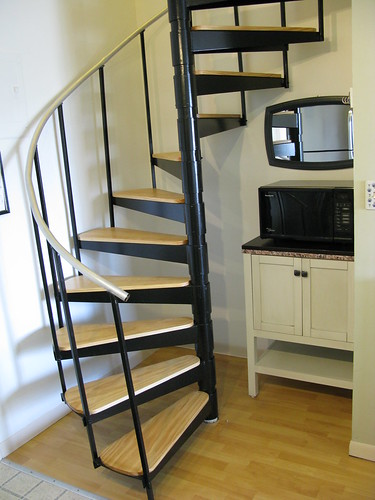
Then, by the end of the weekend we had this:
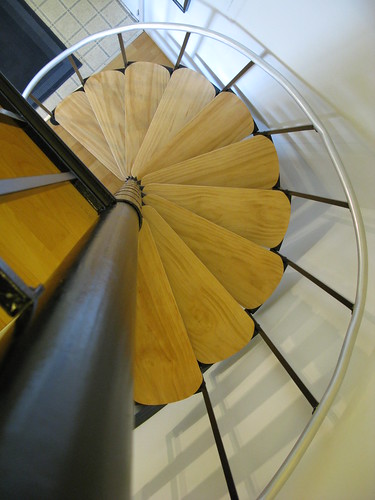


The stairs are complete and I LOVE THEM.

Want to see what we started with? Check out the first post of Opperation Staircase HERE.


March 7, 2011

Opperation Staircase... p3.

A weekend or two later, Pete and I returned to beach condo ready to finish painting the stairs. As much as the two toned look works for some people, we wanted the whole staircase to be a pretty glossy black. In the interest of being able to still use the stairs- you know, to access the only bathroom and bedroom in the joint- we had to work using the paint every other stair method.
Which how we ended up with this spunky black and gray painted staircase after the second go-round with primer was applied. The black stairs were dry and we were able to walk upstairs very carefully while waiting for the gray primer to dry.
The poor dog was so confused about why she couldn't follow us up the stairs anymore! We had to carry her up and down the stairs to make sure she didn't end up a mess of white puppy streaked with paint.

Left of the project To-Do's:

Reveal pretty all-black stairs! (They look awesome. so awesome that I forgot to snap a pic.)

Find flexible stair rail. Any suggestions? We threw out the hideous plastic tube that used to be on there. It was really bad looking and we didn't want to be tempted to put it back on there out of laziness/desperation

Router the wooden steps out. It took multiple attempts (last count was 4 tries) but we finally got all the wood we needed for the project.

Stain steps.

Attach steps to stairs.

Show off the new door that Pete built for our heater closet.

Find/make wall art for stairway walls.

Find a free weekend to take the trip down to the condo to put it all together. This alone is going to be tricky for us, suddenly we're on the verge of spring around here and I'm finding our calendars are threatening us having no available weekend free time.

February 24, 2011

Operation Staircase

First of its kind project for us, redoing a metal spiral staircase.


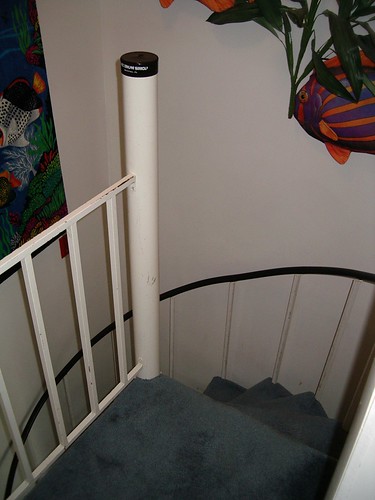
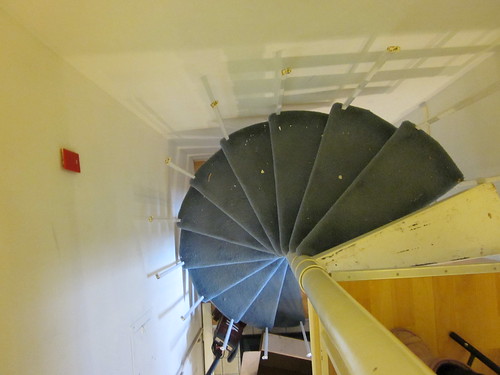
The staircase at our beach condo was in sad ( but still serviceable) shape. The blue carpeting was worn down and perpetually a bit dirty looking. All the spindles and risers had a not so fresh coat of white paint that was heavily chipped and marked with the smudges of countless suitcases and sneakers. But the topper was really the handrail, which was a plastic tube. Like a giant crazy straw.

Those staircase decor items of the 3-d fish and hanging towel? Long gone.

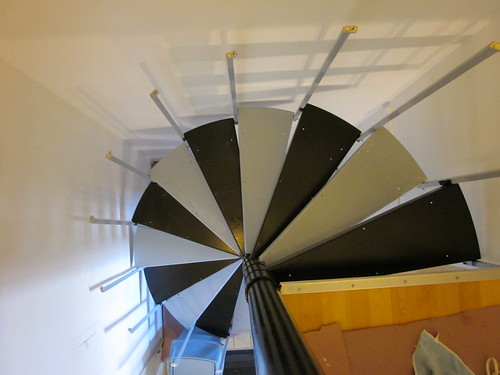
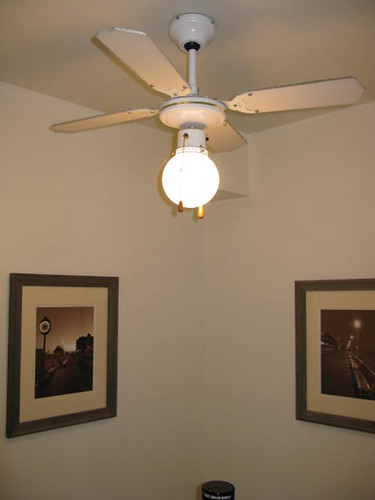
Looking up the view wasn't much better...Hello $30 rickety fan that made clicky noises but provided much needed air flow in the condo.


While the staircase as a whole wasn't too offending, it was really Dull. Out of the whole 700sq ft condo, the staircase is the only little bit of unique interest in the place. Stuck in the corner of blahvilles that is the kitchen.


Since the kitchen is way out of budget right now (WAY), we decided to focus on the stairs for our winter project. I know, cause we needed a "winter project" like we needed another hole in our heads.


First, Pete took off the weirdo handrail and a top step to use as our template. We're lucky in the fact that these stairs are solid metal steps underneath. I think it helps tons on the stability and DIY ability for this project. Had the stairs been more of an open skeleton underneath I'm not sure I would have felt as confident about redoing the treads as I was.

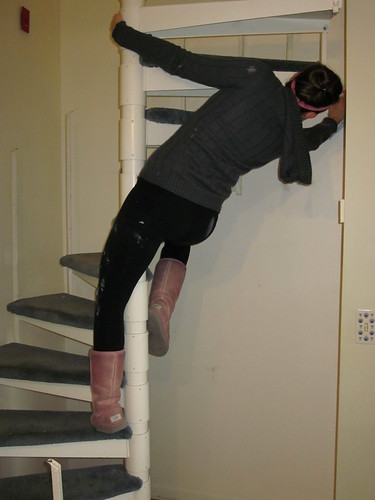
If you look for the pink ugg in the picture below, you can see we've already replaced the blue carpeting on the landing with leftover laminate from the downstairs. Thumbs up for the improvement and for using something we already owned!


Before painting I got out my bucket of water and cleaned off the walls. I'm sure most of you are like this as well, but I feel compulsive about having REALLY clean the walls before painting. The idea of all that painted in grime makes me feel... like I'm committing some sort of DIY crime. Sometimes I tell myself the amount of prep I do is why my painting projects always seem to take longer than they should, especially compared to other bloggers and their gold medal antics in the speed painting olympics. SomedayI should just face the fact that I'm a pretty slow painter. Call me a easily distracted daydreamer.


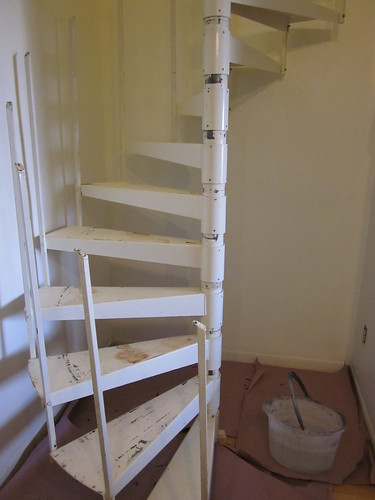
Being Mr. Up and Up on safety, Pete measured the stairs and the differences they had in height from each other. Turns out, our stairs were out of code. As not a one was a matching distance or within the right range from the other. Awesome. So in the interest of safety/covering our asses and being within code Pete took almost an entire afternoon to move the stairs. You can see the bare metal on the center pole how far some of the the stairs were moved.

Next up, the ultimate primer application...