August 30, 2010

Much ado about trusses

Look back over DIY trusses putting up’ing:

- Work with a crew who knows the basics of construction and DIY work. You don’t want to have someone over who has never picked up a hammer before. Enthusiasm -while wonderful is second to skill for this task.


- Be knowledgeable. There were a lot of little things that Pete got done before the trusses went up that I haven’t touched on. Please do not use my thoughts on the garage process as an all encompassing DIY guide to building a garage.


- Realize how dangerous the job can be. When you are alert to the fact you have to be thoughtful and careful the entire time it really helps everyone stay on their toes to keep safety as numero uno.


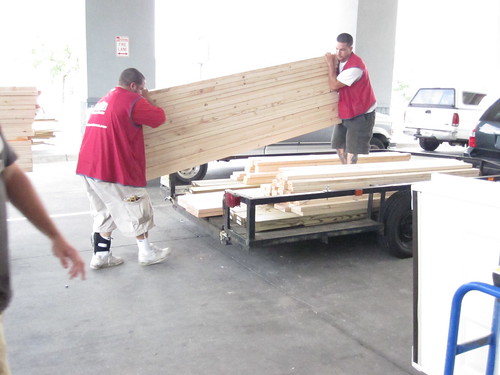
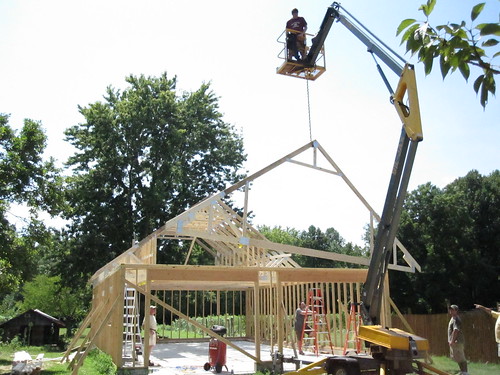
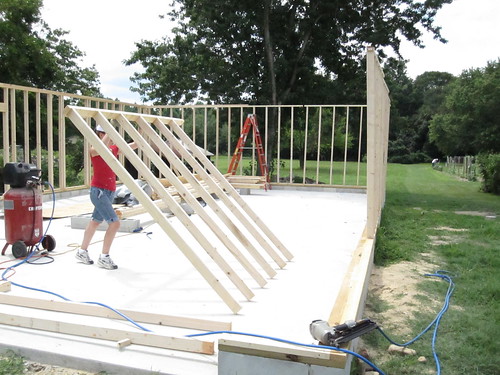
- Have the right equipment! What was done to our garage could have never gotten done without the bucket lift and our firefighter friend manning the controls for it. He was 30 plus feet in the air the entire time and not a peep of complaint. I think maybe we should have gone for a crane though.


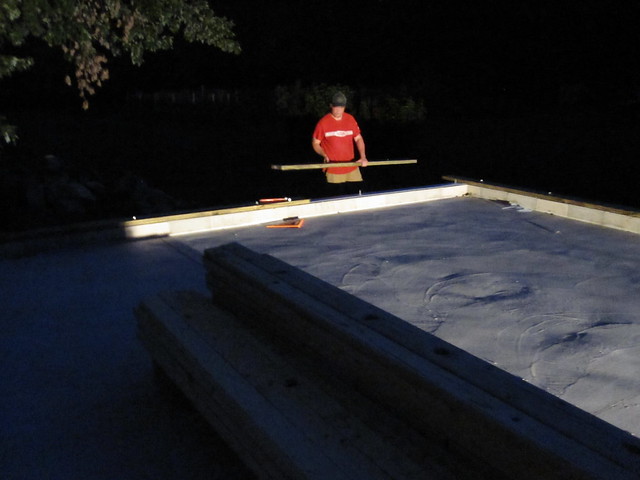
After the trusses went up Pete and I talked about the whole day in lengthy detail and what we learned from the job. I told him that I’d be really hesitant to recommend the same route we took to many people who were looking into building a garage. In fact I’m still not convinced that we should have taken the DIY route for this job. It. Was. Hard. This job was one of those times where I’m glad that the final DIY product is good but it was a royal pain to get there.


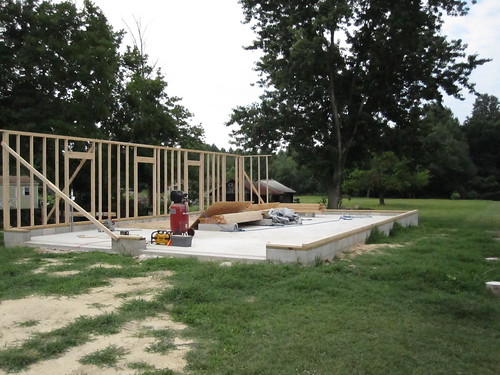
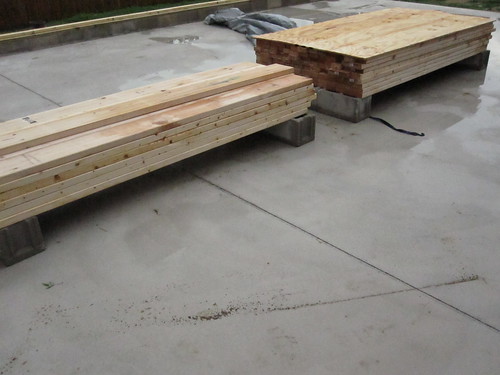
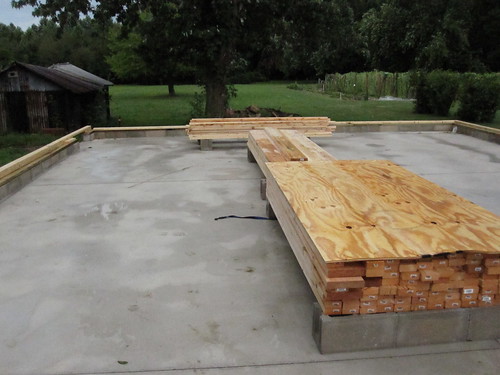
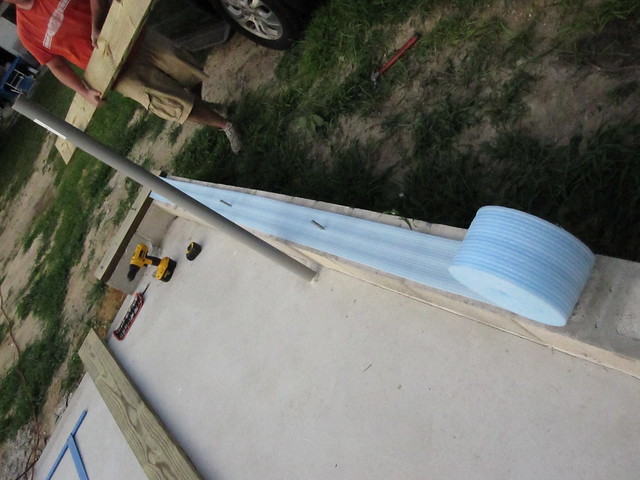
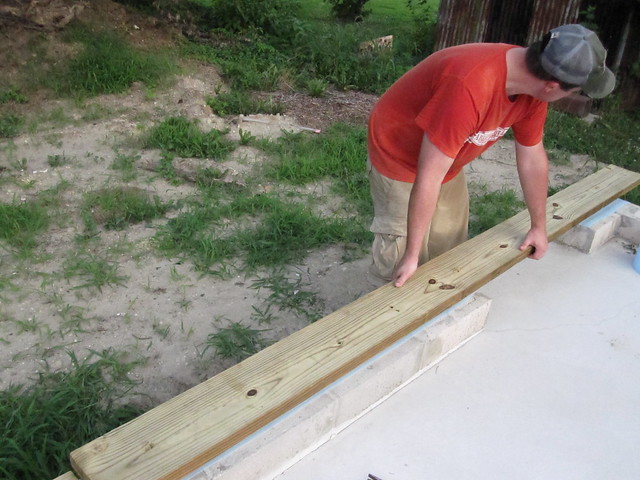
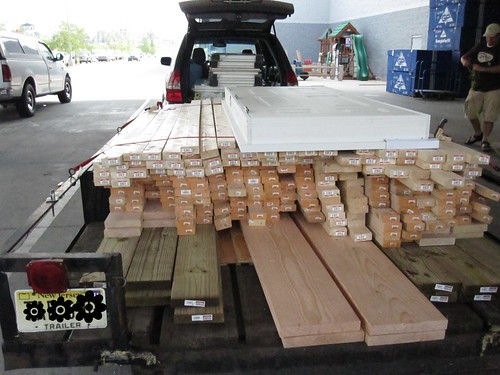
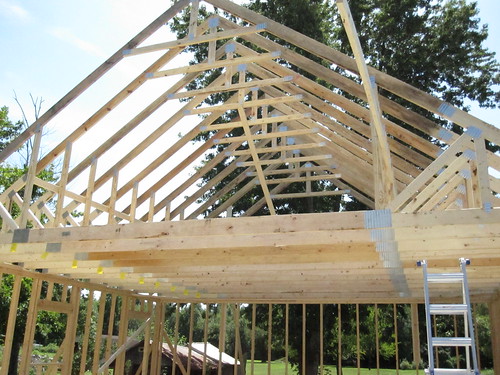
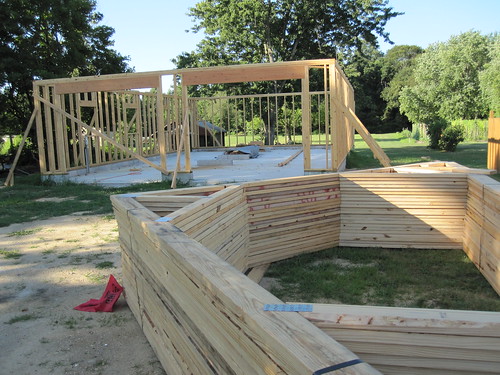
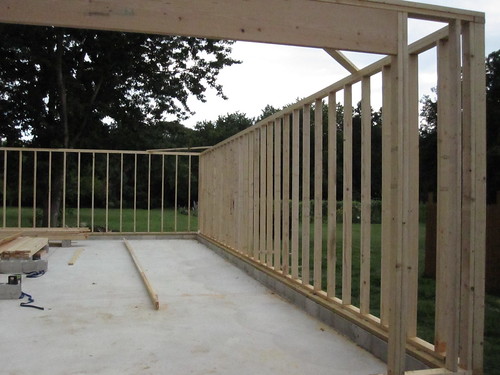
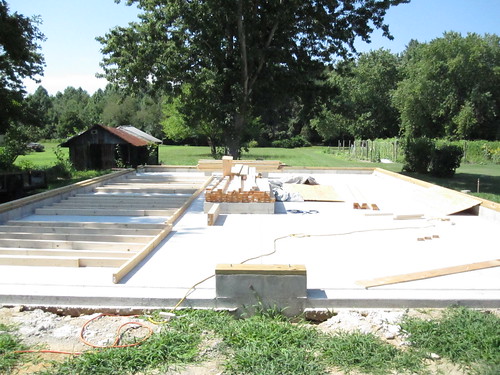
When you combine everything that is making our garage unique, you get a lot of complications with DIY construction. Th big starting point is the size of 26’ x 40’, which makes it a four car garage (hi, my husband’s name is Pete and he is addicted to cars) instead of the much more regular two car sized garage. The size required almost double the amount of trusses than what would be considered standard. Had it been a normal amount, I think everything would have been able to be wrapped up by 3pm, which was when we were about 2/3rd the way through with the 22 trusses.

Then we have the open room space on the second floor, instead of the space being eaten up by roof supports. While I can’t wait to have all that spare space and think it was a great idea to add for not that much more added money, it also lead to needing a higher roof to create usable headroom space and balance out the first floor car space size. The high pitch also helps to mimic of our house’s roof, trying to tie everything together in some sort of continuity. All together this meant we had bigger and bulkier than normal to handle floor and roof trusses and at almost 200lbs each they just added another layer of difficulty to an already hard job.

Had everything not been New Jersey super sized I think it would have been a bit easier to handle and get done without having a panic attack on my end…

Want to see some more DIY Garage building?
Check out Life Begins at 30's awesome garage! I adore the french door that overlooks their backyard and am a little (lots) jealous at how fast the project seems to be moving along.
The Flipping Couple built a massive space to help house their cars from the frosty Minnesota winter weather.

August 24, 2010

Broken washer update

Remember my washer woes of last week? When the washer at the beach condo up died an untimely death and we were going to be looking at a twelve hundred dollar replacement bill?


Like most of you, repair bills that have commas in them make me shudder.

Immediately I fired up my friend Google and started researching the price of a brand new stackable washer dryer. Since the laundry nook that is the condo is super tiny we can't use a full size normal stack able washer and dryers. Unfortunately it seemed that since the smaller sized stackable appliances are not in high demand they are higher priced than one would think and harder to find in stores ready to buy.

Frustrated I sent off a vent email to a close group of friends.

one of them wrote back " I have a extra one of those stackable sets in my basements. You guys can have it if you think it will work"

Turns out that when my friend bought her house, it came with an almost brand new stacked washer dryer. Then a few years ago she and her husband decide to upgrade to fancy new washer and gas dryer. So the stacked set has sat unused and they've been trying to pawn it off on someone ever since then to get it out of the basement.

We picked up the set on Wednesday of last week and on Friday Pete drove down to the beach condo with his younger sister sitting shot gun as his helper. He had a small four hour window of which to get the old washer and dryer out, the new set upstairs and installed. If everything went well it could work. If the job turned into an epic fail, when then the next renters we had were SOL and without a washer and dryer.

Thankfully everything worked 90% well.

That 10%? The stackable unit is about a half inch too large for the laundry nook so it sticks out past the folding door we had there. Oh well. It works perfectly otherwise and frankly at this point in time was all we needed. Maybe in the off season we'll cut the drywall away behind it to put the door back on.

When this all worked out so well, I felt as if it was all my built up karma points had been cashed in.

Total savings by DIY: $1,150.

August 23, 2010

Rain Delay

The day after the trusses went up dawned grey and misty, and Pete had to head out to work for a morning assignment. By the time Pete returned the mist had turned to steady rain with no sign on the radar of stopping. Undeterred ( or stupid) we geared up to finish a few things on the garage. Having slight hope of catching enough of a clear section of the day in order to get them done.
Silly silly us.
We arrive at the Wee house and it is pouring rain.
See all the piles of wood to the left of the garage sitting on the ground? We moved them "inside" the open garage in hopes of preventing major warping. Once that is done it is still pouring rain. Pete needed to get up to the roof in order to add the purlins, which would be our next step. There is no way it is safe to do that though with all the rain coming down. He was contemplating what to do next when I snapped this pic from under the cover of my pink hard hat.
Here you see me, with my naturally optimistic nature and love of rain keeping a smile on my face. Yeah it was pretty rainy out, but whatever. I try to make the best of every situation.
Half an hour of pushing our giant rented machine around in the sandy mud in order to get it hooked up and I'm twice the drowned rat I was before. The smile is gone, I'm freezing and day dreams of dry shirts are dancing in my head. Behold- the worst picture of myself I've ever put on the internet. The heated seats of our SUV were amazing on the way home.


August 20, 2010

Up go the trusses!


Last Saturday we put up the trusses on the garage...

Putting the trusses up was hard all around. It was physically exhausting from lifting, hauling, climbing and running around. Mentally it was tasking because putting up these trusses was a super dangerous job. Weighing in at about 200lbs, 26ft long and about 12ft high for each truss these bad boys were not to be messed with or underestimated. Wrong moves could have spelled disaster for the truss, our framing or worst of all, one of us who were working on the crew. My dad was on a job site once when a roof collapsed and unfortunately there was a fatality because it.


Right before 8 o'clock in the am we roll up to the job site with coffee in hand. During the next hour we go about prepping the site while our recruited helper, my dad plus our friends Eric and Steve, roll in. Then Pete's dad shows up with our rented scissor lift. Which my dad insisted on and we all agreed that it was $350 well friggen spent at the end of the day.


The guys get down to work with hoisting up and placing the first truss. I'm trying to watch to see where a job roll for myself can be created. Unfortunately, this is where it all started to go downhill for me. I can't really explain why, but I was about two steps short of having a complete panic attack by the time the second truss is going up. It must have been that I watching all these guys whom I really care about and love doing such a dangerous job. Whatever it was exactly, I had to stop watching immediately or I knew I was going to loose it.


Since there was really no job for me to be doing on the trusses I went inside the house and decided to do some organizing of supplies and demolition. Getting away from watching the work outside helped immensely and I was able to focus my energy onto something else besides worrying.
Once I calmed down and after my run to Wawa for lunch for everyone, I was able to snap a few pictures of the work happening. Then I ran back inside and did more work there until late afternoon. Some might say I punking out on putting up the trusses and I get that maybe I was a little bit. But the reality really was that there was not anything I could do to help until a certain point.

That certain point came mid-afternoon when about 2/3 of the trusses were up. After a grueling day of hard work (that we seriously appreciated) two of our crew had to leave. Which is when I jumped in to help finish up. There was an established rhythm going on at that point so I was able to find an area of the job that I could do. Soon enough I fit right in and was working along with everyone like part of a well oiled machine.


The sun was going down as the last truss went up 10 hours after placing the first one. At that point I can hardly explain to you readers the sense of relief that I felt. Everything was up and there were no major accidents that occurred. I hugged our friend as he went to go home for the night, thanking him profusely for all the hard work that he put forth for our benefit. Sometimes the kindness of your friends and family really touches you and this was one of those times. They must really like us to do all that work.


Even though the sun was gone, the night wasn't over. Trusses are super sensitive when just set up with no braces and the last thing we wanted was a stiff breeze blowing through and knocking all the hard work done. After a quick pizza and blueberry pie break we got right to work on bracing the trusses for the night. Even though we planned on coming back the next day to finish the bracing you just never know about the weather and what it plans to do, so we wanted the peace of mind.

Right around 10pm we rolled outta there for the night.


Long hard day it was indeed.


August 19, 2010

Almost Truss Time!

You've all seen the finished framing that Pete and I did together, now what you don't know is that it took an additional weekend worth of work to get that frame ready for our pre-made floor and roof trusses. However, I fled the work site and left Pete standing there to shoulder all the final details by himself. The call of the beach was just too great and I jumped in my car to meet my sister and family down the shore for the weekend. It was glorious! (To justify my absence I did clean the entire house before leaving...)


Pete finished all the little framing details and mid week met up with my Dad to get the delivery of the trusses. We thought long and hard about getting pre-made trusses or going the DIY route would be better. After getting quotes from various truss companies Pete worked out what the material cost would be to him for DIY. I'll have to get the exact numbers from him, but the cost difference was not so great that it just made sense to save a lot of headaches and time and to go with pre-made. Especially given the GIANT boards that we would have needed to span the width of the garage, I have no idea how we'd get 24ft boards to our house.


Early Saturday morning we got to the house and these 22 trusses were just waiting to get put up on the garage. These are a little different than standard x trusses because we wanted utilize the second story of the garage as usable space, so all that open space you see between the floor and roof will someday be finished off into a room!

Coming up next: The long Saturday. Putting up the trusses was the hardest house project we've tackled yet.

August 18, 2010

Rental Washer Broke...

Yesterday we got the news from our rental agency that the washer in our condo unit bought the farm. The motor just up and died according to the maintenance guy who was sent out there, and we both believe him as the washer is likely older than I am. The washer and dryer came with the unit and we knew it wouldn't be long before replacements were in order. We're just thankful that it was the motor that busted, not a major leak causing water hose.


The laundry closet when we bought the place. There is a real door on there now, no more seashell shower curtain.
Check Spelling


Because the washer died while there are tenants in the condo, we have to get a working machine in there asap. We also need make sure there is a washer for the three remaining summer rentals we do have booked. An hour after the original news our property management company calls us back with the estimate for getting a new washer.


$1,200.


I might have laughed. Or choked. I can't remember.


I told her that I do not authorize that amount to be spent. She sounded peeved, but hell I don't care. I'm not spending twelve hundred dollars on a basic washing machine for my rental unit. Especially when I don't have a fancy new machine at home! I, the self proclaimed laundry queen, have an older model that came free with the house.


Last year Pete and I priced out models at the Sears Outlet and they ran about $700 for a basic stacked laundry set. Those same models often popped up on craigslist for $300. Because of that shopping we mentally budgeted somewhere around $500 and it was on our to do list for this off season. With the new bathroom, bedroom floor and A/C unit last year, we were just tapped out by the time this rental season started.

It is the timing of all this that just sucks, two more weeks and we'd have the time to take care of all this without it being a rush. Now a project that could have been easy is now super urgent, when we're in the middle of another huge project that is demanding all our time and money.


Now we have to scramble. Find a new machine that works for this unique space, find the time to go down there and the help to get the machine up to the unit. Hope it is as simple as possible to swap the units and hook up the new one. Pete's nervous about getting the dryer off the wall. If you look closely, it's not a stacked unit we have now. Someone just mounted a dryer to the wall above the washer...


Overall though, we're not that worked up over this. We'll find a way that works for every one and doesn't cost us twelve hundred dollars. There is just no point to getting all bent outta shape sometimes. While it is annoying to deal with, things like this happen all the time when you have a rental property so you have to be prepared to deal with them as they come up. Last year we got two huge plumbers bills and had two a/c unit calls. Since both those problems are fixed now it was bound to be something else. In the large picture of everything it is still so worth it to us to have this place and rent it out in the summer, so that is what matters the most.

August 16, 2010

Four walls up!

In a matter of one hard working day Pete and I rocked out the remaining framing! By the time we left that evening all four walls were standing and had been properly supported by some temporary braces. Temporary braces add needed support to the frame until the rest of the structure can be build up. They also give the homeowners peace of mind during pop up summer thunder storms that tons of money and hours worth of work aren't going to get blown over by a stiff breeze.


See that long piece of lumber? That my friends would be our very first FAIL of this garage project. Pete and I thought it would be a *great* idea to engineer a whole bunch of the really bad/leftover wood into one plank that would span the width of the garage. Our s-m-r-t plan was that it would be great extra support.

So I go about laying out all this lumber and we get to air nailing it together. Hoist it up and over onto the top plate and... major failure. The wood bounces like a rubber pencil. No way will it help to support the garage, if anything I'd bet that it would help to pull the walls in. We had a good laugh at our own expense and ditched the lumber.

August 15, 2010

Lumber sitting


How does one put 16' boards in a car that only has 14' of interior space?

One quick stop at the local lumberyard for some needed wood and suddenly I'm recruited by Pete to keep the 2x4x16's from falling out on the way home. All three minutes home I'm sitting on the lumber while leaning over keeping the trunk door closed as much as possible. It was surprisingly hard and back/hand crampy to do.

* note, I'm pretty sure my method of lumber sitting/ leaning to hold a door closed is illegal and therefor you should not try it at home.

August 12, 2010

Garage walls going up!

See Eva... Raise a wall.
I was bound and determined to raise a wall myself. The whole time I was doing so Pete kept making "tickets to the gun show" cracks about my lady biceps. Like I've said before, I'm suprisingly scrappy for my slight-ish stature but I'm not exactly ripped in the muscle department.


And I didn't purposely try to match my Phillies hat to my work shirt. It just worked out that way. The hat was free at a game, and it rocks for working outside because of the mesh backing which lets the noggin breath a little.

August 11, 2010

Coffee table hunting

My blogger friend (and former real life coworker) Lisa of ...just over the river put out the ABP for a new living room coffee table. Her adorable new dog Pilot has a habit of getting his toys stuck underneath their current coffee table, which leads to rug scratching and head clunking as he attempts to get the toys out. Worth a mention is that Lisa is not exactly super thrilled with their current coffee table so this pretty valid reason to get a new one has her excited.

I started to write a response to her coffee table APB when I realized that it was going to make for one super long comment. Which prompted me to switch the location of the response to here, with the suggestions I found that might work for her (and anyone else out there searching for a new coffee table).

Here are the requirements:

No or very little hang-over on the table top for dog safety
"Light and airy" (the current table is too "heavy" for the space)
Could have a bottom shelf but not too low
A durable top because "someone" forgets to use coasters and we put our feet up on the table
In the $200-ish range would be awesome
Could be glass or wood
Could be rustic with modern lines


And the following suggestions:


This Nate Burkus Glass Top Coffee table is funky and a little unexpected, but it would pair well with Lisa's living room style. The slim profile would also open up valuable eye square footage in her cape cod home. Plus, with a glass top glass marks will wipe up with ease!


Next up we have a coffee table that I love so much that I would make out with it behind the bleachers after school.


Hello Holbrook Coffee Table! It has the same look as Restoration Hardware's Brickmaker Table, for about 1/5 the cost. With the heavy top balanced out by a substantial,yet open bottom the table slides in as an"airy-ish" option. Plus the Holbrook also offers up a marriage of rustic and modern lines that was one of Lisa's wants for the style. Or at least its my interpretation of it rustically modern. Unfortunately the Holbrook is out of the set budget and the top might need some extra protection from the "someone" who forgets often use a coaster.


To make up for going over budget on the last table this one is way under. Check out this $99 special from JCPenny! It has a modern airy vibe, and plenty of room for dog toys to roll through underneath.

Squeee!! I love the Metal Accordion table from Urban Outfitters! From the flat square top down to the wee little feet of the table. Very open and airy, plus it is easy on the wallet with a non-budget busting price of $128!


There you go Lisa, all my suggestions. Now I know why we don't currently have a coffee table... finding "the" one is hard. Good luck and I hope this helped a bit!

Edit:

The over-budget Pottery Barn Tanner Coffee table is a fave of mine and a home blog staple.

You can replicate the look by grouping two of these metal and glass cocktail tables from Overstock.com. They had the cheapest price I've found for that look. Bonus is that if you ever get tired of using them as a coffee table they can be broken up and relocated to be used in a while slew of different places around the house.

If anyone has any more suggestions for Lisa, drop on over her blog and leave a comment!

August 10, 2010

Up goes the first wall!

After our push to get the sill plate laid in the 100 degree heat we were seriously relieved that the next weekends' weather was going to be in the normal upper 80's. Still hot and sweaty, but oh so much unbelievably better to work in. During the week the inspector came out and passed our sill plate!

Passing the sill plate inspection meant we now could move onto the framing. Turns out, I love framing! We worked really hard and at the end of the weekend the entire garage was framed. It was really as close to instant satisfaction I think I'll ever get on this job site.

Bright and early Saturday morning this is what the job site looked like. Notice the one framed wall on the garage floor, we couldn't put that one up without first getting the passing approval from the inspector.


First corner goes up.... and I start to get the hang of how to hold the wall steady as Pete nails it down. Pretty proud to say that clutzy mc drops a lot didn't let one wall fall at all!

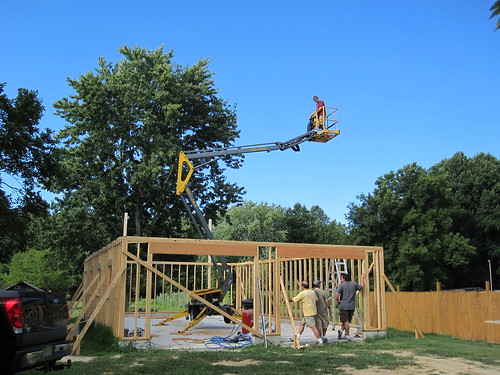
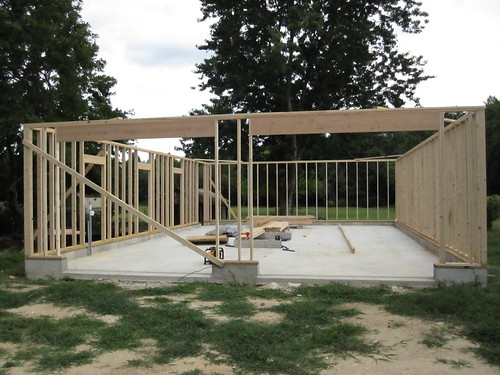
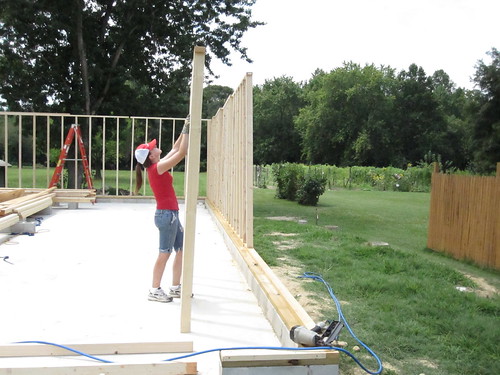
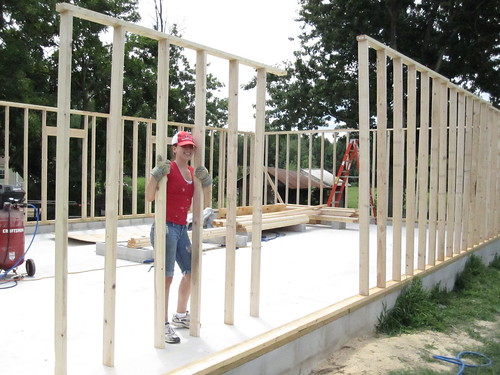
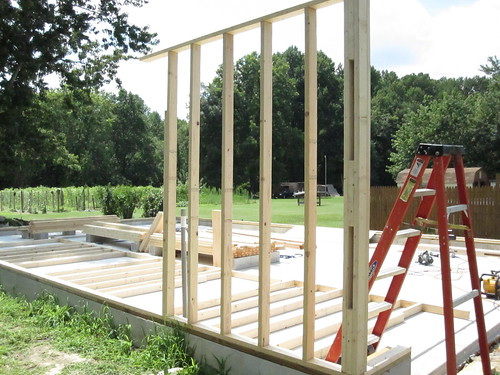
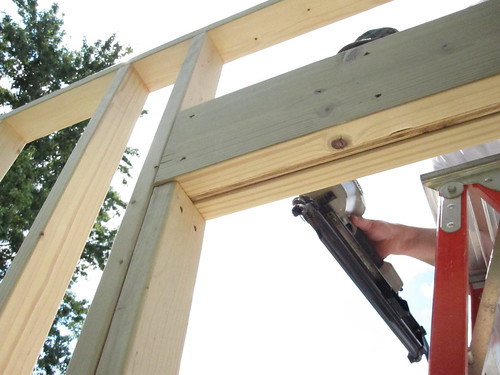
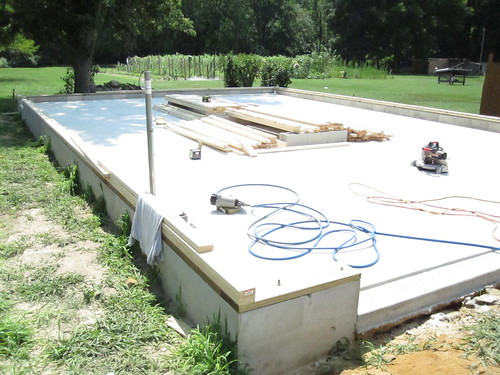
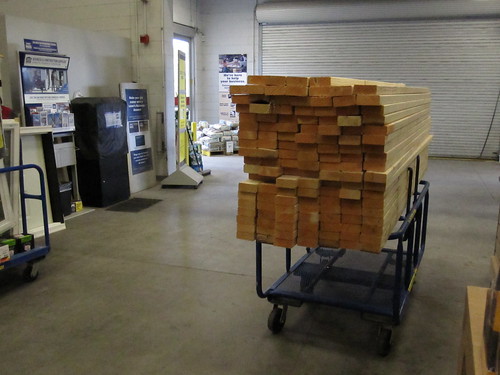
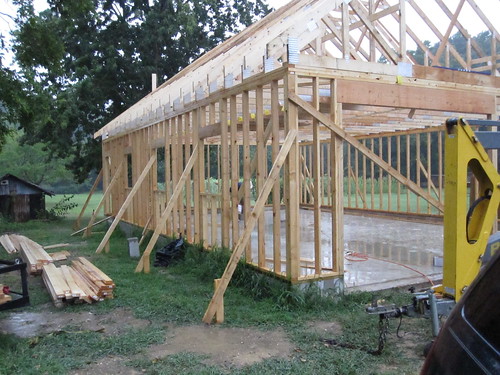
After the wall is up and squared off, Pete nails in the window headers. In this picture you can see my new BFF, our air framing nailer. If you are going to undertake a long term project where an extensive amount of DIY framing will be required, buy the right air nailer for the job. You'll thank yourself for making the investment.

First full wall up!

August 7, 2010

Today Pete and I are on our way to pick out our roof and siding materials! This makes me super excited. More proof that I am turning into such a little construction nerd :)

August 6, 2010

Sill plates, framing and storms!

Sunday morning rose with promises of another scorching day and some late afternoon thunderstorms. We met up with my dad at the job site around 8:30 and he got us right to work. I started hammering in a board on top of the sill plate, to act as a foundation for our framing that Pete and my dad were laying out.


One thing I learned real quick while leaning over hammering was that the sun reflects off of concrete like a mo-fo and will burn your eyes fast. I have pretty tough eyes that aren't very sensitive to light, but I was dying a few minutes in. I had to dive into my purse and pull out my good sunglasses, the Marc Jacobs that I paid $40 for at Nordstrom Rack and try very hard not to sit on or break like all my past sunglasses because these were a splurge for me. So here I am pulling out my good sunglasses on a construction job site because my eyes are watering and I can barely see.


Sassy.


A few hours of sweaty work go by later and we're about to break for lunch when I hear my name being called. Again, and it is by a female. What the? I turn around and my friend has pulled into the driveway! I start jumping up and down like a spaz because, 1: I am a spaz and was surprised and 2: this friend had a baby three days ago! Her family was headed home from the hospital, which is seriously 30 seconds from the Wee house when they saw our cars and decided to stop by. Which meant I got a little peek at the baby :) When I say I was cheesey smiling the rest of the day I mean it. Seeing her little baby at our house reminded me why we're doing all this DIY. We want a family someday (not anytime soon mom) and the Wee house is where we want to be. Full disclosure of honesty, I started crying a little bit because I was just SO happy for them. I'm a little bit of an emotional nerd.


We broke for a late lunch and checked out the weather forecast, severe thunderstorms starting between 5 and 6pm. Decide to go back to work and squeeze in a few more hours worth of work. We're both busting our rear ends working away when I look up. Um, that cloud does not look good. In fact there are lots of clouds that don't look good all around us. Crap. None of our wood is stacked or covered and it looks like a major storm is headed our way. At this point it was 3:30, so I thought I had at least an hour until the storm him.


I abandon my hammering job and start to stack the wood into 4 piles, breaking them down by size and quality. This way we won't have to grab from one big pile and check every board for straightness. We'll know that if we're grabbing a board from a pile that it is the right size and has already been checked for curves, splits, knots and bows. There are three piles on the garage foundation: Two "A" piles and a mixed B pile. All reject wood gets thrown back into the trailor to be used for scrap or returned.

As fast as I'm working the storm is sneaking up faster. Looks like the estimated time of arrival was off, because it is just about 4pm. Pete notices the clouds forming so he comes over to help, working together we might be able to cover the wood piles before the rain starts. Um, not to so lucky. We're trying to strap down the first tarp when the storm comes rolling in, the first few fat raindrops start to hit us and the sky above is dark as dusk. Lightening strikes are all around us and the thunder is sounding immediately after the flash of light.


I'm a lover of summer storms and find getting caught outside during a summer rain to be a fun time. But I do not eff around with lightening and bad winds. That crap can kill you, especially when you have a huge open space behind you and you're standing under one of the biggest trees in the area. With one lousy tarp on the wood pile we give up and run inside to escape the storm.


About thirty minutes later the worst has past. It is about 20 degrees cooler outside with a light drizzle. At this point we decided mother nature has determined our stopping point for us, finish up tarping the wood piles and pack it in for the weekend.

August 4, 2010

Garage Sill Plate Time!

By the time we got to the Wee house with our load of wood it was early evening. Not exactly the start time we'd originally envisioned, but running late is usually our MO. Especially when we try to squeeze a billion things into one little Saturday.

Take a close look at our wood pile, notice the darker greenish boards at the way bottom? Those would be our pressure treated lumber that is needed for the very first step of garage construction. Mental head slap. Now we had to move around the whole pile of wood in order to get to the boards we needed.

Pete squaring off the first plank of the sill plate. The blue underlay is a barrier to help protect the wood from direct contact with the cement. This offers protection from water, the leaching acidic nature of the settlement cement and insects from penetrating into our hard work! Well worth the $5 a roll price tag for all that protection. Super easy to install as well, just unroll and attach. Cut to size.

Trying to match up the right bit size for the holes in the wood. We marked the holes in the wood by me holding the board level over the screw pins and Pete smashing it with a hammer to leave an impression on the broad side of the wood. Worked pretty well for us and we thought we were so SMRT for figuring out how to do it, the next day my Dad filled us in on a little secret. We could have just measured the board and marked out where to put the holes. Whatever. Smashing worked just fine and was way more fun.


Spanning the door frame opening in the back. To help save yourself some headaches and to make sure everything perfectly lines up- always span the openings. You can attach first and then cut away the opening second. Much easier to lay down one large board and square it than to do two smaller boards.

Bound and determined to get this sill plate done we pushed on past sundown and into the night. There was a little bit of guilt for breaking the neighborhood quiet drilling and hammering, but we packed up around 9pm. Which I suppose isn't that late and disruptive. It was so much nicer working once the sun went down, while it never got "cool" having some relief from the beaming 98 degree sun was wonderful.


Oh, and this is a little after the fact- but I just came across this great Bob Villa How-To article about garage foundations. Well worth a read if you're planning a project like this yourself. Even if you plan on hiring out for the whole or part of the garage. Familiarizing yourself with the work that should be getting done is very important.

August 3, 2010

Starting the garage!

Let us start with last weekend... since that is when we kicked off the DIY portion of our garage building.

Saturday: The day broke steamy and hot early in the AM, with the mercury predicted to rise right on up to about the century mark. We had someone coming from Craigslist to see my car which was put up for sale earlier in the week. Since I could barely stand to see my car go I choose to spend the morning cleaning up the downstairs and making mass quantities of iced coffee to have on hand.

We're just about to run out the door when we get an SOS call from Pete's older sister. She needs to return a rental tool by noon but needs a truck with a tow hitch to do so. We agree to come over and help, but mention that we have to get to the DMV first in order to register a car before the deadline is up and we have to pay more money.

Load up the trailer and head to the DMV which is about twenty five minutes from us. Twenty minutes later we're done with the DMV and are headed out to the car to go over to Pete's sister, who lives a good forty five minutes from us. Thankfully we're all able to load the tool and get it to the rental agency before it closes. Phew. Crisis adverted.

At that point, its is past noon and we're late for our date at Lowe's.

We're about a half hour from the closest big box stores in any direction. But once we break that magical thirty minute mark there is a plethora of different options. We choose to avoid the stores that tend to be a suburban Saturday afternoon mecca location and picked one that is a little father out and we know to be on the quieter side during prime time.

Best decision ever.

Not only was the store blissfully air conditioned (the norm) but it was also relatively empty of other shoppers for a Saturday. Every single sales associate we dealt with was pleasant and extremely helpful. While we shopped around for the smaller quantity of needed wood, we put our request in for the massive amount of 2x4's.


At the end of our two hour shopping session there were two carts full of wood waiting for us at the contractor check out. Plus, two super strong guys hanging around to help us load it on to the trailer. Both guys sounded relieved when they found out about the trailer, easy loading! We ended up with three contractor cart loads of stuff.

When they started loading the wood onto the trailer, Pete and I were like " Uh, is this going to to even fit?" It was a lot of wood. Like, a lot. Determined as ever to get this done the Lowe's guys loaded the trailer while we worked on filling the backseat of the MDX with windows.

Huge huge huge THANK YOU to these guys. They saved us what was going to be quite literally over an hours worth of work by knocking it out in about 15 minutes. Friendly, no complaints and kept joking around with each other. We were blown away by the high level of customer service. Besides tipping both of them, which we do believe in if you receive excellent service that goes beyond the normal job description/expectation, Pete went in to talk the manager to be sure he knew about the great experience we had at the store that afternoon.


Once the car was loaded it was time for the slow and steady ride home. With the heavy weight load on the car and trailer combined with the excessive heat warning we were really nervous about a blown tire which would be a disaster. When it was possible Pete would pull over and let the tires cool down on the side of the road for a few minutes.

Thankfully we made it home with no problems. Just enough time to grab a quick bite before heading over to the Wee house for some work! It might have been late afternoon but we still had a planned job ahead of us in order to be ready to work with my dad the next morning. The sill plate of the garage had to get down.

August 2, 2010

2x4's Not For Sleeping

Pete and I have dived in head first for the DIY stage of building our garage and I might even dare say it is going really well!

After two weekends of work I'm pretty happy to report that we have all four walls up! Done by yours truly, Pete and our air nailer. Who happens to be my new BFF.

I totally got caught napping on a pile of 2x4x10's this weekend by a neighbor yesterday. Just a little cat nap after eating lunch. Did I ever mention that I can pretty much sleep anywhere? For instance, I once snoozed in the dentist chair while getting my teeth cleaned. and you should have seen me folded up into a tiny airport waiting room chair during a layover on our honeymoon.

Oh! and we were gifted a new crowbar! I call him Commodore Smashy.

Hope everyone is enjoying their monday. :)