Showing posts with label Demolition. Show all posts

February 3, 2011

Demo: In Progress

Believe it or not, I like in progress pictures better than the before usually. There is something about this stage of demo that is so exciting to the inhaled too much plaster dust renovator. You can see the result of your work right away and that is incredibly gratifying during a large project like this. At the same time there is still much more to demolish and discover about the house, which makes my crowbar jump with anticipation of what is to come.

The fun of demo helps to even out the disgusting moments of demo. Like when you tear out a bathroom sink and discover an insane amount of mouse poop underneath. Or when you throw up in your mouth from another poop discovery.

January 6, 2010

Living Room Demo- Almost there!

I really wanted to get the Wee house living room broom clean by the end of the year. Some might say that it was even a goal of mine to get that done before I drank champagne in celebration of the new year. Well big fat goal fail. The super snow storm stomped on the plans that we had slated for working hard core on the Wee house all weekend. It was our last available time slot before the holiday festivities began their full swing. I think that if we had that weekend available for renovation work that the living room would be cleaned up by now, but oh well. The snow was so worth getting set back and not meeting that goal.


We were able to to the house on the 26th of December, fully intent on getting a lot of work done! Except that we couldn't. Because there was about a foot of water in the basement. Two feet of snow melting in about a 24 hours because of day long rain equals a lot water for our basement. Pete wasn't going to walk through the flood to get to the electrical panel to turn the electricity on. We leave the electricity off in the house except for when we're there. Thankfully my ipod was fully charged and broom cleaning requires no electricity, so I just put my earbuds in and got to work. However the husband was pretty cramped on his workload because it required using electricity. Don't worry, he quickly found something else to work on for a few hours.


Before-


And the After.

I like how clearly you can see the bumpy top layer of flooring here. It is almost like I have a bounce house in the living room, that is how much the thing moves when you walk on it.

This side of the room has a really dark corner on the left hand side. I love natural light (who doesn't) so the bleak corner bother me a little. However, that window is actually inside our craptastical wrap around plastic porch thing. So right now it receives very little light, hopefully once the plastic thing gets torn down the corner will be a brighter place.


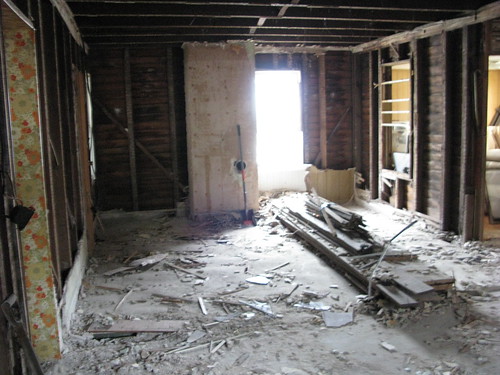
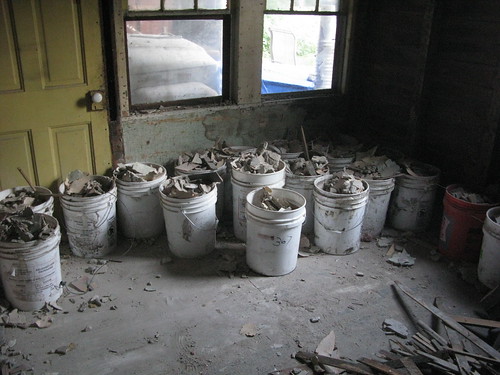
The other side after, with all our construction stuff neatly arranged.


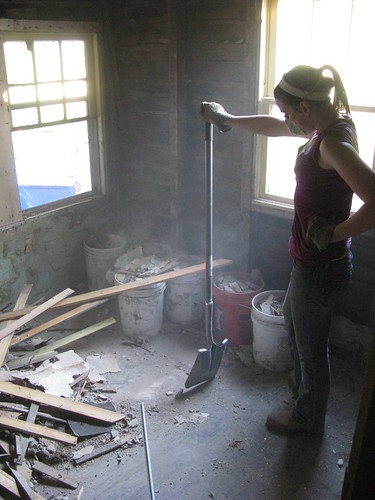
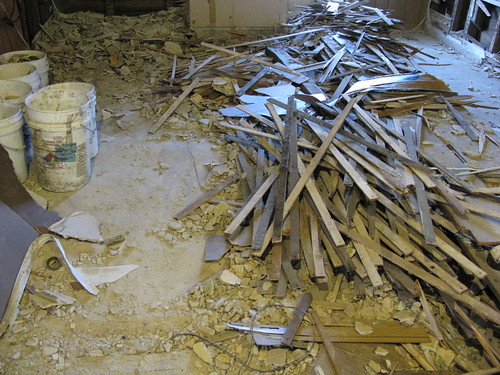
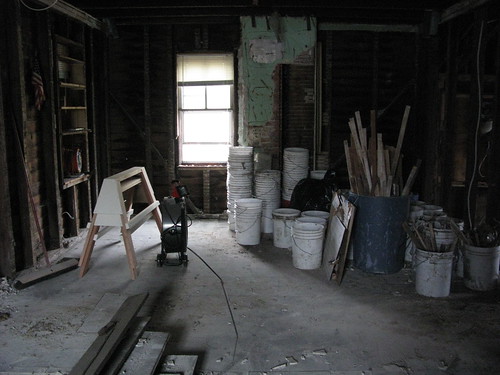
Once all the remaining bits get swept off of the floor I'm going to go around the room and pull off the rest of the plaster from the walls. Because the piles on the floor got so high at times there are parts closer to the bottom that couldn't be reached during demolition. You can see those remaining bits it in some of the pictures. After that is done I'll sweep again and shop vac the floor as much up as possible. Which is when I'll consider the living room demolition DONE!

December 3, 2009

Termite Damage

There are a variety of reasons why we decided to tear out all the walls and take most of the house down to studs. One of those very important reasons was so we could see and evaluate the condition of the house's bones. While everything looked to be on the up and up, you just never know about what is hiding behind the walls.

An inspection of the house revealed old termite damage and neither of us were really surprised to hear that. It's an old house, and old wood is very tasty to munching bugs. Thankfully there is currently no active damage and the damage isn't too extensive.

One of the first rooms to get the walls torn off was the future dining room. And. Well. It wasn't pretty. I'm telling you right now that this room has it firmly in its mind to be the problem child of the whole stinking house. Not only did I throw up (in my mouth) the first day that I worked on the room, but also its the only room (so far) that has presented us with any amount of termite damage on the beams.


The subtle blue arrows point to the damage.


Its pretty funny to see how only one or a few certain beams can get affected. Why only that one piece of wood? A lot of the damage in this room is very centralized in certain spots. Which makes it easier to fix. So, overall this damage isn't much of a surprise or a problem.


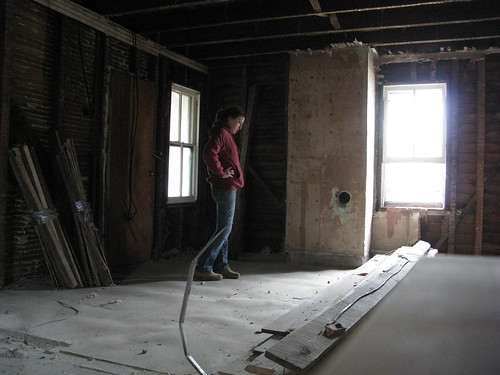
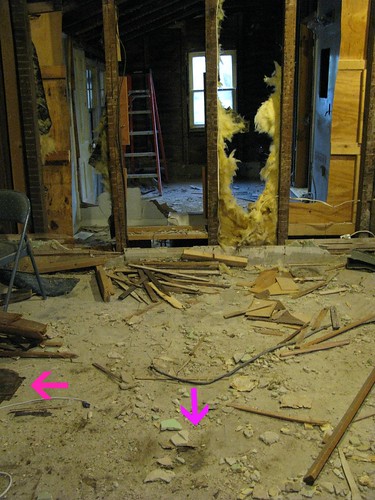
If we made the decision to not tear out the walls would I be worried? No. Not really. I'm of the school of thought that if an old home is still standing strong today, then its going to keep standing strong for a looonnnggg time. Despite the damage you would not believe how solid the room is still. Pretty crazy how they used to build houses back in the day.

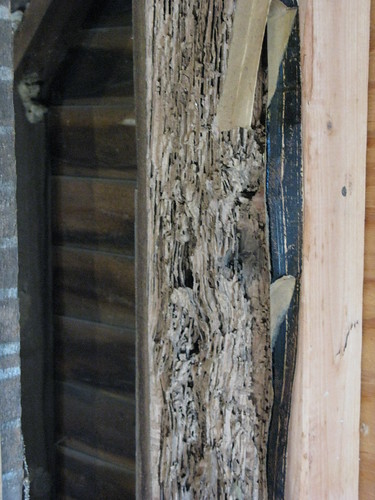
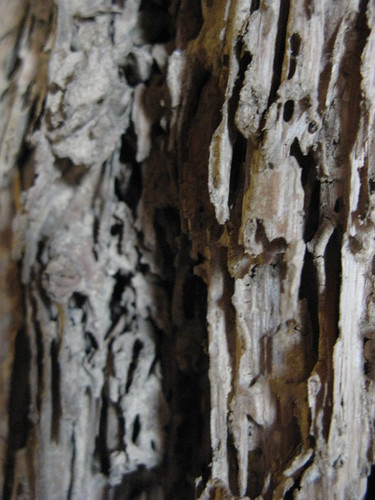
Termite damage is fug.

December 2, 2009

Cleaning up Lath (and the death of our fridge)

The day that I'm done with cleaning up the living room, I'm popping open a bottle of champagne. My goal is to have the room broom clean by the end of December. Which is fitting if I can get the timing right with the Champagne.


This last weekend was a massive throw out effort because no dump trips were done in November at all! Time spent in November at the Wee house hasn't been as much as previous months. Because of that we focused on doing as much demo as possible during our shorter visits.


Continued on with the plaster and lath clean up.


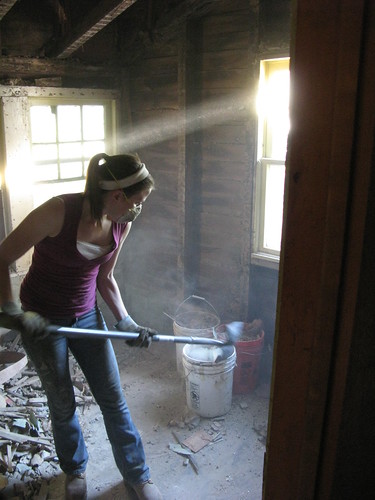
While I was bundling up the lath I got a potentially killer idea about how to re-use it! We're going to need flooring for the two front rooms. Since those rooms are made from a converted front porch they just have a slab with fug carpet. Hunting down matching or period hardwoods for those rooms could be really tough and expensive. Laying tile would likely be the easiest flooring, but sometimes that can be so cold and I'd rather have a warmer feel that goes throughout the entire downstairs. Well... lath is already trimmed and cut to size. It's old wood. Why not see if it can be laid down, stained and poly'd as our front room floor?! I'm going to do a test area over the winter to see if this idea can work. If it does work then I'll start stock piling all the lath we'll need.


Every single bucked we owned was full, all 60 something of them. Loading them into the trailer took for.ev.er. I learned from my past mistake and ditched the two at a time in favor of being able to move the next day.


Then, a miracle occurred. Pete decided that we should throw out the fridge! I've been campaigning against the Wee house fridge since we bought the freaking house. He's been really resistant about getting rid of it. Saying its helpful to have extra fridges or he could put it in the garage as a beer fridge. You know me. I love beer and I prefer to spiff stuff up to keep it out of landfills. But this fridge. This fridge is past spiffing and I don't want my beer in that! It was old (not energy efficient in the least) and has been growing mold for years. I don't want to even talk about the smell because it makes me gag just thinking about it.


First we find out that the fridge can't fit through the front door. So Pete takes the fast route of sledge hammering off the doors. Then the door hinges won't fit through, so he sledges the fridge more. Now the fridge is just fitting through the door frame, but only after taking out one of our screen doors. It was like survival of strongest between the door and the fridge. Poor door never stood a chance.


At this point I'm on the outside of the house trying to pull the flipping thing out, Pete is pushing it from the inside and all I have visions of is this giant fridge falling on me. I'm looking around for cushy spot that are clean of debris so I can land and roll out of the way to avoid being crushed.


There are no pictures of this. Sorry. We were both a little preoccupied.

Eventually the fridge is outside. I'm just thankful it didn't fall on me.

Don't forget about Cans for Comments!

November 20, 2009

Hope for the original floors!

When we bought the Wee house the living rooms had the worst flooring in the whole house by far. I've mentioned the condition of the carpets in previous posts but to quickly recap they were dog pee soaked and extremely worn. The first thing we did after buying was rip the carpets and (what was left of) the padding up. Bet you didn't know that padding could essentially disintegrate? Well padding can wear away over time and it can also merge itself to be one with the carpet backing.


There were two big reasons we got the carpet up ASAP. The main reason was the smell. It was the kind of smell that makes you not want to breathe and had made permanent home in the carpet. No amount of airing out the house was going to get rid of it. Second reason was the floor underneath. You can see from the basement that the house has the original random width pine flooring. We were afraid of the damage that could have been cause by the wet carpets and wanted to get them off the wood immediately.


The thing about renovating an old house that rings true for everyone and every project is that one never knows what surprises they'll find out after uncovering things. Our carpets were no exception.


Sitting under the carpet on one side of the room was a layer of vinyl tiles that can only be described as the same ones my elementary school bathroom had. Head scratchingly odd right? Underneath those tiles there is a layer of a thin floor leveling type sheet. I only know this because I peeled away the soggy tile to see if they were attached to the floor or not.


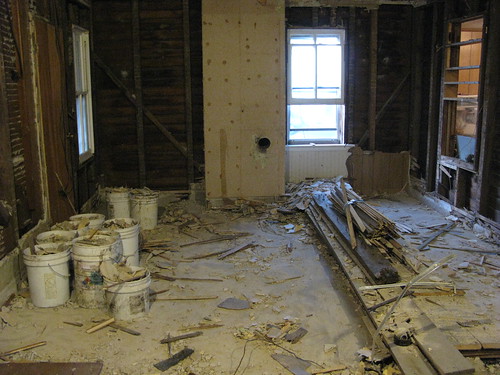
We think these are the same tiles, except in our attic landing area. You can see the dry version of the under layer here, which hopefully has helped to save our floors from all the moisture.


On the other side of the room the carpet removal revealed an extra top layer of floor leveling stuff. Except it is not installed well and has high bumps all over it, so the floor moves around as you walk. Fun times.


Since tearing out the room lead to reclaiming the original shape I was able to see a tiny bit of the real floor that missed all the layers because of a beam that was placed there. Which lead to the discovery that there is a layer of 1/2" plywood down underneath the tiles and thin layer. The arrow is pointing towards the end of the plywood and you can see a tiny smudge mark where I tried to see the actual floor. Quick little spit shine.


Another layer of flooring! I was afraid that the wee had leaked below the under layment to the real floor because in some of the areas the tiles are still soaked and peeling up. I guess that means the underfloor does a good job of keeping moisture on the surface and not below it, but you never know. Left arrow is pointing out tiles I've accidentally scraped up, right arrow is showing a still damp area, despite having moisture sucking plaster dust on top of it for months...


The best part of all these layer of flooring? The act as the best shield between my plaster shoveling and the real floor that I could ever ask for. I don't have to worry at all as I scrape my shovel along the bottom scooping up dust. If we didn't have this protection I can tell you the job of removing all the plaster from this room would 10 times harder. I'd be a total freak about not messing up the floors!

September 21, 2009

Tearing out a Dining Room

Oh future Dining Room... I can already sense how much work you're going to be. It's only been a few weekends of working on the house and you've already provided me with the most head scratching WTH moments so far. Remember the vomit in the mouth incident? That took place in the (future) dining room.

First thing with every room is the complete tear out of the walls and ceilings. Especially important in this room because our future dining room is supporting an addition. The addition was built up over time and that top part might become part of our master bedroom someday. I don't want to be blissfully snoozing away one day when the floor gives way beneath me!

Opening up the walls allowed us to survey how well the work was done for the addition and to see how time had treated everything. Overall the condition is pretty scary, but not worse than we were prepared for. There are no problems that we can't handle. It's so funny that you can have a solid as rock old house and the only part that is the "problem child" is the addition!

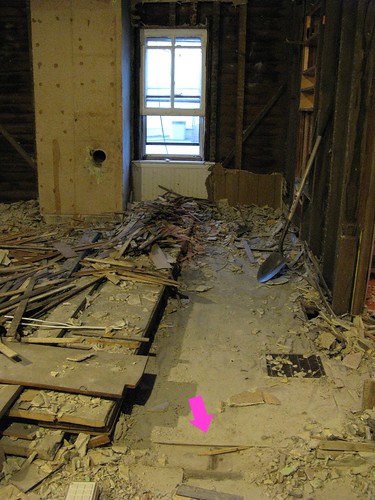
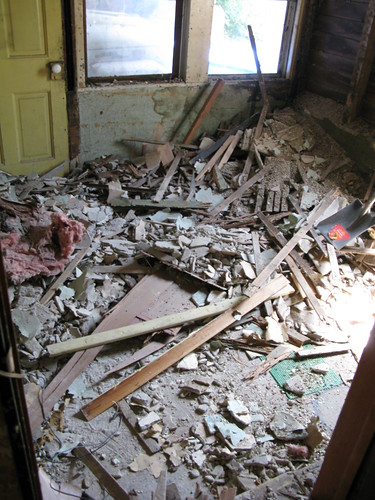
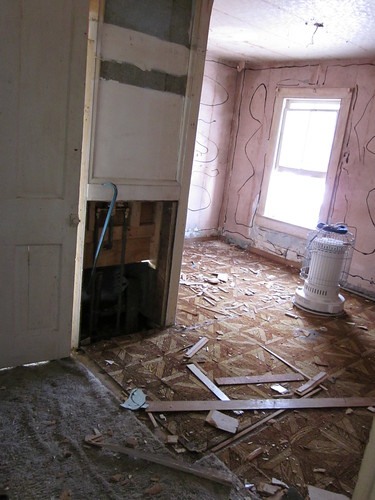
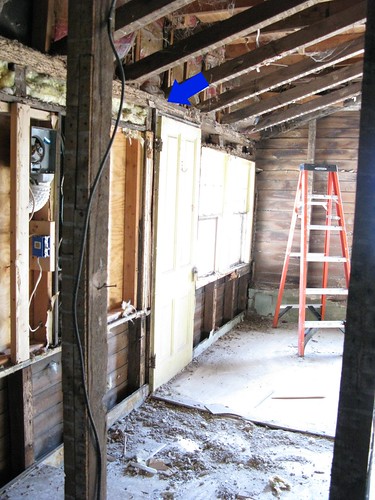
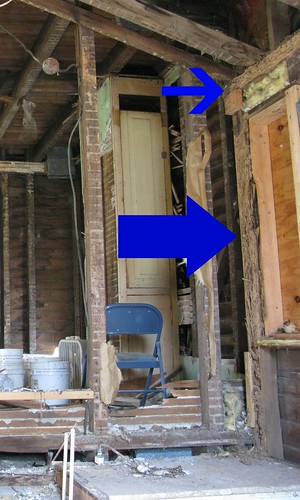
Fun times lay ahead of me with cleaning up this mess. It is pretty easy to look at the room with such overwhelming amount of work to do and not even know where to start. Don't discourage yourself right off the bat. It is really important not to sike yourself out! I do wish that house demo came with little handy neon arrows pointing out your start and end points. That would be helpful. But alas, the Wee house has no such handy arrows so I had dive in where I thought best. Which happen to be the door into the room, I just slogged through with picking up lath and other random bits. Eventually progress started to be seen.


Late afternoon sun was streaming through the windows before I had a noticable handle on the mess. Once I got to the turning point in cleaning everything, the work went along quickly and pretty smoothly when it came time to shoveling plastic/unidentified bits into the buckets.


Ta-Da!! All clean! and yet still miles away from the eventual end point. Oh well, we're not racing anyone with trying to get this house done. So for now I'll find my accomplishments in the little projects.