
What does that mean? It means that when I start a project I usually get about 90% through before I throw in the towel. There is something about completing the final home stretch that doesn't work for me. I'd sometimes like to blame my ineptitude to finish projects on my undiagnosed ADD.
The reality is I get bored or frustrated. Sometimes I even get all freaked out that my project is going to turn out like poop and scare myself into stopping before there is actual physical evidence out there of my failure. This is the part where I could launch into many lengthy paragraphs of my personal trials and recent life changing epiphanies. But that crap is boring. Moving on.
In storage at our other house is an old dark pine dining room set. There is a hutch, buffet and dry sink. Purchased about 5 years ago at a thrift store we had lofty goals of stripping the dark finish off and refinishing it. Stupid us forgot that we had an entire house to refinish, so that project got pushed to the wayside. For a few years the set sat in our dining room, accented by the salmon paneled walls, as an example of two 20-somethings who were trying to build a nice home with no money.

Then day came two summers ago when we gutted the living room and the set got sent over to storage. Storage is where the set has lived ever since. We've decided that in the next house to build in a china cabinet and that there will be no place for our dark pine set once everything is finished. I'd recently been obsessed with the idea of putting a small bar in our house. Mainly because I want to get more room in the kitchen cabinets and all the wine/martini/beer/maragita glasses take up a lot of space.
I convinced Pete that I should make a bar out of the dry sink. Since we had it on hand in storage with no plans to use it in the future (and I'd get about $5 selling it at a yard sale). Unfortunately the frigging dry sink doesn't fit by 3" where I really wanted it so location B, the dining room, came into effect.
This would one of the first bigger home decor projects I've taken on by myself, so I was pretty excited about it... good thing I had enthusiasm...
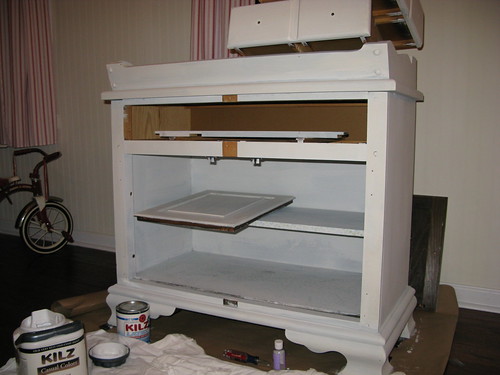
Forward and onward I went with my enthusiasm for creating the bar! To start I wiped the whole piece down with some warm soapy water and a rag. Off came the cobwebs, dust, debris and stain. That darn stain was going to give me problems already. Since I was planning to paint a dark color with crackle I wasn't that concerned with it really.
We've painted every room in our house at least once so it was only a matter of heading up to the attic and picking the right rust covered paint can for the project. Down came the primer and I got to work. Priming took longer than I imagined, about two hours. I did two very thin coats, just to make sure everything was adequately covered. Even the inside got coated. Sure enough the stain was a problem again and leached through the primer. Turning it from white to a very mellow yellow color.
The next day (I really barrel through projects at first) I went over the whole thing again with a coat of white ceiling paint. This was to be the under coat of the red crackle. Sometimes its pretty miraculous what a coat of paint can do, as this was when I started to see the potential of the dry sink really come out. I also started to notice the fact that this thrifty dry sink would make an excellent baby changing table.
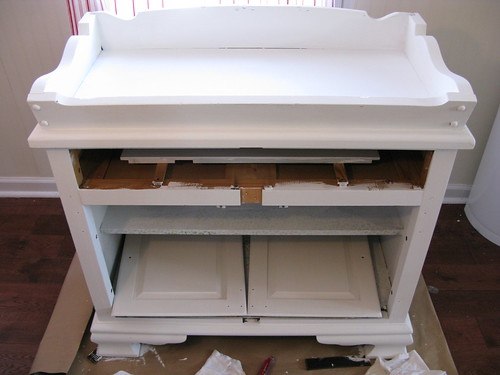
Noted that little fact to myself for the future. From home bar to baby table!
After the white coat of paint I was really digging the way it looked! The sink was looking really fresh and updated. Even the interior went from dark to cheerful. Now you could look in and actually see if something is on the shelves. It should be noted that I could not remove the old shelf paper, so I painted on top of it. Some new, fun scrapbook paper will be modge-podged onto the shelves eventually.
There are no pictures of me scrubbing the floor with a sponge trying to get all those tiny paint flecks I splattered everywhere. I'm 90% sure I got them all.
Here is where my story takes a wrong turn. I'm going to gloss right over the horrible experience of painting the bar with the crackle finish. Short story, the red paint was sliding down the sides of the bar and puddling into a goopy mess near the bottom. The crackle never dried and I was stuck with this gluey bar where the red paint peeled off. Ugh.
A few hours outside on a nice Sunday was needed to get the bar cleaned up for a new coat of paint. What a pain in the rear it was to try and correct the crackle finish disaster. Good thing I still had my initial motivation keeping me going, because the dry sink was about 5 minutes away from becoming a bon fire.
In the driveway I washed off as much of the red paint crackle as possible. Then I sanded the entire piece down, Thank God for the sander! The doors were taken inside and I was able to wash off almost all the paint with some hot water. That night I re-primed everything with a coat of grey primer and was able to get on the first coat of the new red color I bought. Chianti by Behr. Which matches the kitchen back splash tiles a lot better than the previous used red color.
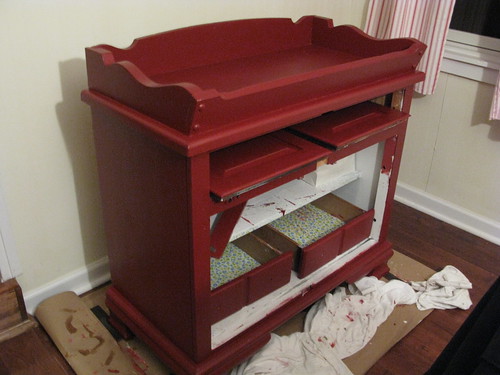
Another two coats of red paint and everything was ready for the antiquing. Hours later, tons of sandpaper and two t-shirts covered in wiped off glaze - It's done. Except I'm not sure if I like it...So once again I'm about 90% done and have almost thrown in the towel.
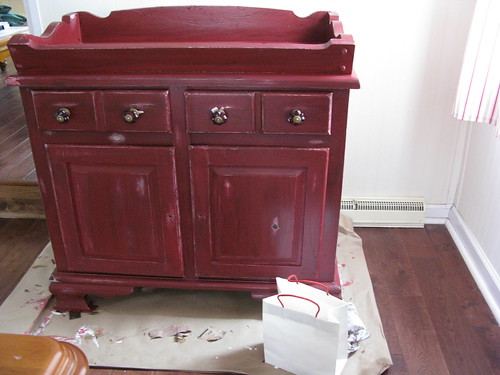 At this point in the project I’m remembering the exact reasons behind my 90% finishing attitude. The final details of any project suck. All your hard work gets put together and only then is it then when you see if the vision came though. Or if you earned a big fat fail. I spend another hour (or two) working on the final touches. This included another coat of the antique glaze and updating the hardware. I'm thrifty so instead of buying all new hardware the hinges and screws got a coat of brass spray paint. They ended up look pretty decent for the total $5 paint cost.
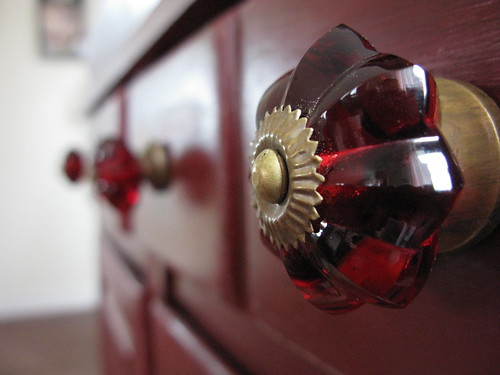
I love the knobs.
Since the old screw holes had been painted over it was not exactly easy going to get the hinges back on. That's when I bust out the drill, and subsequently its when Pete wandered downstairs because he heard power tools. Turns out I was using the drill wrong, but not really wrong, just a little wrong.
Praise the power tool gods, because the drill made putting the doors back on an almost painless process!Unfortunately I (Pete) realized that a piece of wood ended up getting warped. Because of that warping I couldn't finish everything as planned that night. Pete had to glue it down and we had to wait to put a finish nail on the other end to get everything squared away.
Now the bar is finished, living in the dining room just holding all our rarely used glassware. I'm still not 100% sold on how much I like it. I think in its next life I'm going to paint it some glossy, solid finish bright color (aqua?!) The lines of the ol' dry sink arn't lending themselves to the distressed look very well...
Things that we already had laying around the house:
The Dry Sink-part of a dining set we bought from a thrift store for $125 about 4 years ago. Since the dry sink is about 1/4 the size of the china hutch I'll use that reasoning to make it cost about $31.25. One fourth the total over all cost of the set.
Primer Gray
Primer White
paint-First Red Paint
Sandpaper
Items that I bought new:
Crackle- $14
New Brush ( That I ruined)- $7
New Paint- $14
Fancy Knobs from Anthropologie- $48
Bronze Spray Paint- $5
Adding together everything I bought new and the dry sink equals about $120.
Not too bad. Especially since I learned a ton while doing this.
Time....
I'm not going to even add that up. Maybe a total of 24 hours? It took me what felt like forever.
I love the dry sink! However, when I first saw it I immediately thought "what a great baby changing table/dresser!". I give you credit for doing a project like this...I'm more a 80% or half-assed kinda girl. :-)
ReplyDeleteIt turned out GREAT! After all your hard work you have something terrific to show from it. The knobs are to die for.
ReplyDeleteAnd best of all.......you COMPLETED IT!!